Portraits
|
Over the next couple of weeks, we will be thinking about self portraits. We will learn how to draw eyes, noses, the correct proportions of the human face, as well look at how artists represent themselves in their art.
To get us thinking, first answer these two questions in your sketchbook:
Next, look at the presentation by clicking the link below, and answer the questions in green in your sketchbook. Self Portrait Slideshow |
|
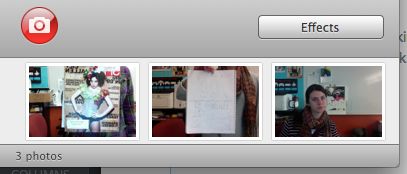
Upload a selfie to the Google drive! Yes, you have to.
|
|


|

|
|

|
|
Assignment for 3/11/14
Self Portrait Prompts:
In your sketchbook, draw a "self portrait" for each prompt on the list below. These "self portraits" wont look exactly like you, and that's good! Like the artists we looked at in the presentation, we don't need a portrait to look like ourselves, if we are trying to say something other than "this is what I look like." These drawings are just ideas, they can be messy and don't have to be colored. Do two prompts per side of page- so split a sketchbook page in half and do one on each side. Its okay to use the front and the back of a page, too!
|
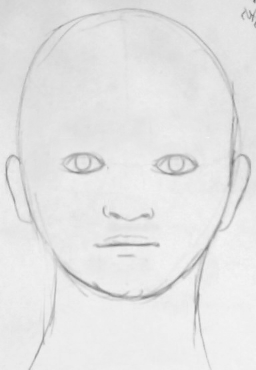
Start each portrait sketch with a basic head, neck, eyes, nose, ears, and mouth, like we learned on Monday.
|
Next, make a series of self portrait sketches according to the list below.
Choose 6 of the 8 listed below. Draw yourself if you were:
|
Rube Goldberg Machines
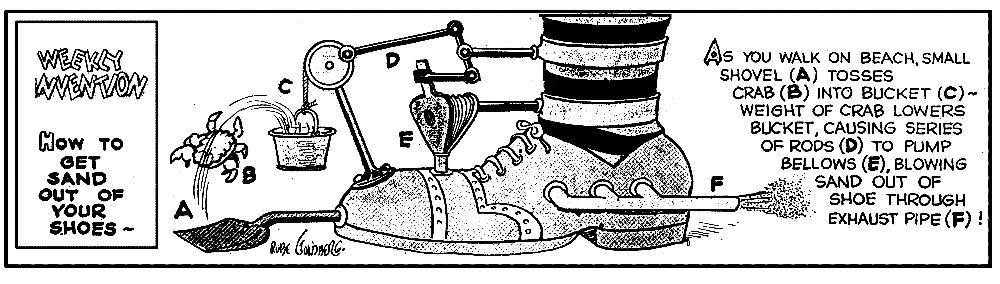
"Sand out of Shoe" by Rube Goldberg
|
A Rube Goldberg machine, contraption, invention, device, or apparatus is a deliberately over-engineered or overdone machine that performs a very simple task in a very complex fashion, usually including a chain reaction. The expression is named after American cartoonist and inventor Rube Goldberg (1883–1970).
|
|
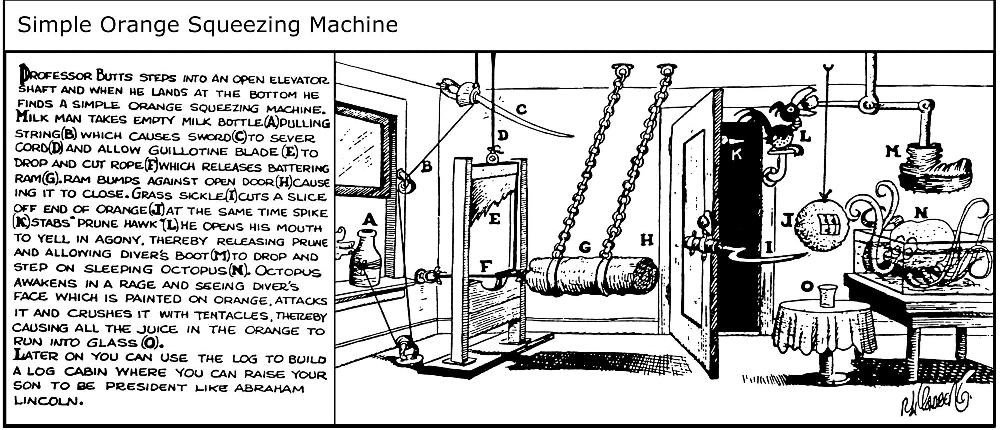
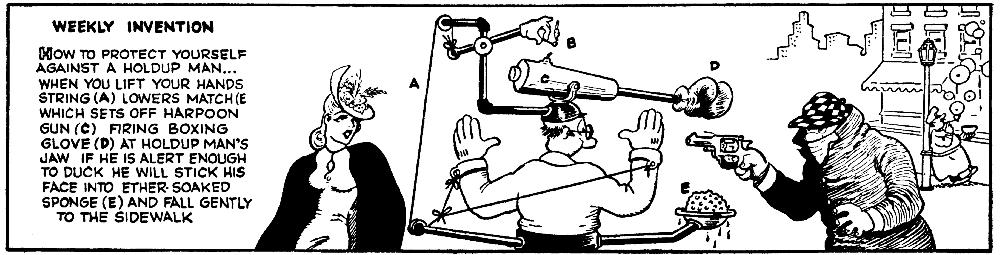
Rube Goldberg's cartoons became well known for depicting complex devices that performed simple tasks in indirect, convoluted ways. The example on the right is Goldberg's "Professor Butts and the Self-Operating Napkin."
The "Self-Operating Napkin" is activated when soup spoon (A) is raised to mouth, pulling string (B) and thereby jerking ladle (C), which throws cracker (D) past parrot (E). Parrot jumps after cracker and perch (F) tilts, upsetting seeds (G) into pail (H). Extra weight in pail pulls cord (I), which opens and lights automatic cigar lighter (J), setting off skyrocket (K) which causes sickle (L) to cut string (M) and allow pendulum with attached napkin to swing back and forth, thereby wiping chin. |

"Professor Butts and the Self-Operating Napkin" by Rube Goldberg.
|
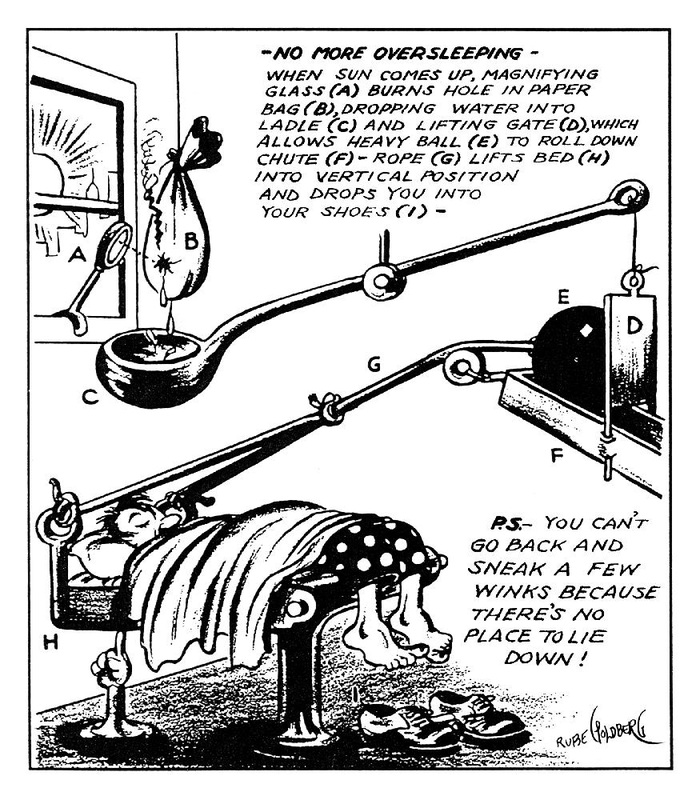
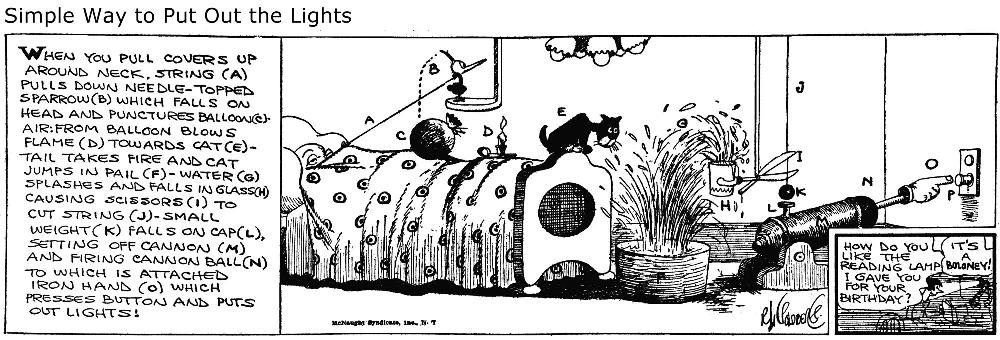
Below are some examples of Rube Goldberg's comic strips of his overly-complicated machines. What kinds of objects to you see repeated in his inventions? Make a list in your sketchbook.

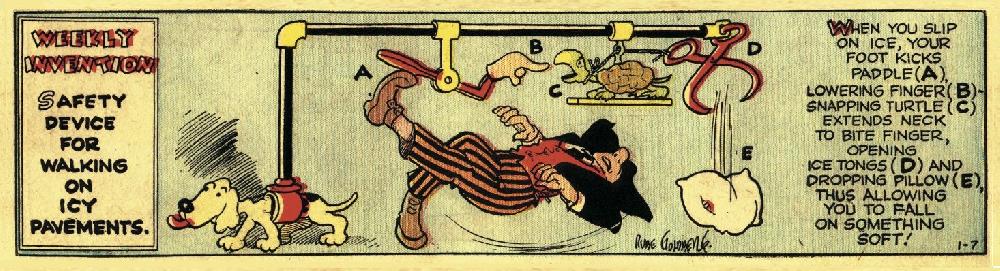
Here is a link to a gallery of Rube Goldberg drawings. Click on the links and look for samples of his "inventions." What are some general themes of his machines? List some that might interest you, in your sketchbook.
Below are links to the videos we watched in class. What are some objects you saw used in the videos? Write those in your sketchbook.
Daily Activities for Rube Goldberg Project:
- Friday- complete worksheet. Do rough sketches of machine.
- Monday- start first draft of machine drawing.
- Tuesday- finish first draft of machine drawing.
- Wednesday- transfer first draft drawing onto final paper. Trace lines with sharpie. Begin coloring.
- Thursday- use water color pencil to color in final drawing.
- Friday- finish final drawing with water color pencil.
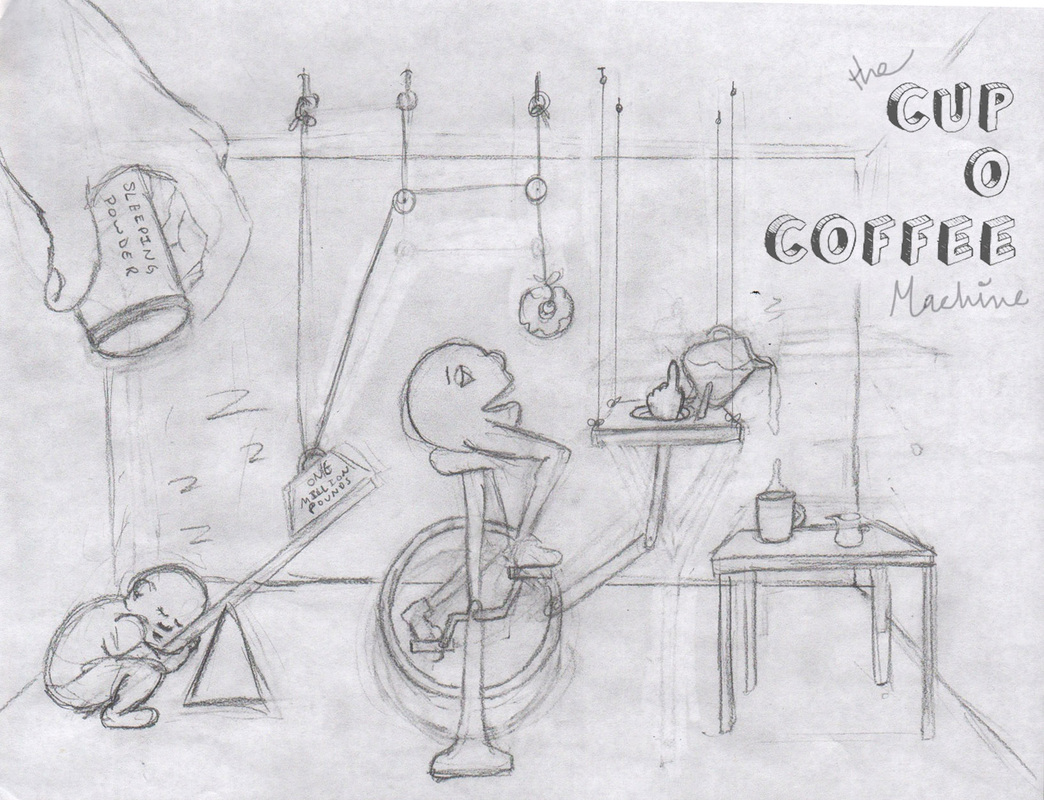
"Pour Your Coffee Machine"
1. Hand shakes sleeping powder on to munchkin.
2. Munchkin falls asleep.
3. Lever falls and raises weight.
4. Weight lowers donut in front of weird dude.
5. Weird dude pedals bike to try and get donut.
6. Pedaling causes hand to push over pot of coffee.
7. Pot pours coffee into cup.
|
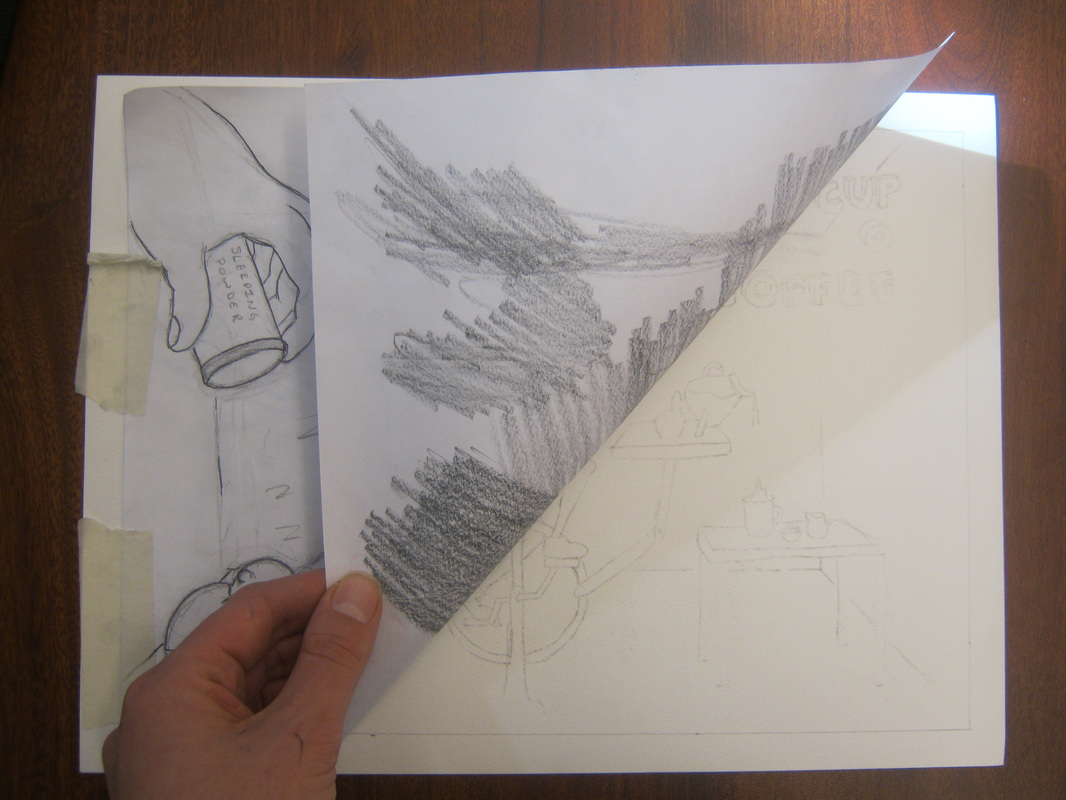
This is my "rough draft." You can see eraser marks, smudges, and sketchy lines... that's okay! Why? We are going to trace this image, transferring the drawing onto a final piece of paper. You just have to make sure that on your rough draft drawing, you like the shape and placement of your objects, and can see them enough to trace them.
Requirements for Rube Goldberg Machine (rough draft):
|
|
Next Steps for Rube Goldberg Drawing:
|
|
Drawing from Observation: Still Life Drawings
|
We will spend the next week working on our drawing skills, eventually creating a still life drawing. This is a hard subject to teach, and sometimes a frustrating subject for students to learn. I promise you, though, no one is going to fail this project for being a bad drawer!
Click here for the presentation you will takes notes on in your sketchbook. To help ease some of your frustration, here is a daily breakdown of what you will do in class: |
- Day 1: Presentation and notes. Start up-side-down drawing. This will help you "draw what you see, not what you think you see" by making you pay attention to contours, rather than drawing the subject from memory.
- Day 2: Finish up-side-down drawing. If you finish, you can choose a picture from the internet to draw up-side-down. I will show you how to flip the picture on the computer.
- Did the drawing come out well?
- Were you surprised?
- Did you "draw what you see," or did you catch yourself trying to draw from memory?
- What parts of the drawing did you do well?
- What parts of the drawing could be better?
- Day 3: Contour line drawings in sketchbook. We will do a series of blind contour, continuous line contour, and contour line drawings.
- Day 4 and 5: Negative space exercises and drawing. See below for instructions.
- Day 6: Drawing from shapes exercise. See Below for instructions.
- Day 7: Grid exercise
- Day 8: Begin still life drawing. Choose one area of the arrangement to do a small contour line drawing of. Choose another detail from the still life arrangement and do a white on black drawing.
- Day 9 through 13: Final still life drawing.
Negative Space Exercises:
You will do two negative space drawing exercises in your sketchbook.
Remember, negative space is the empty space around and between objects in a drawing. When you draw negative space, you are not drawing the object, but what is AROUND the object.
Step 1:
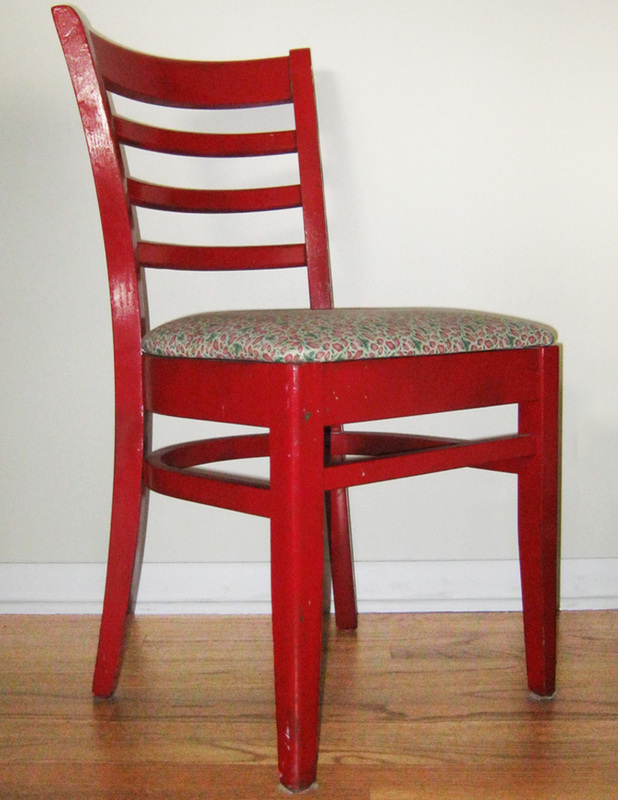
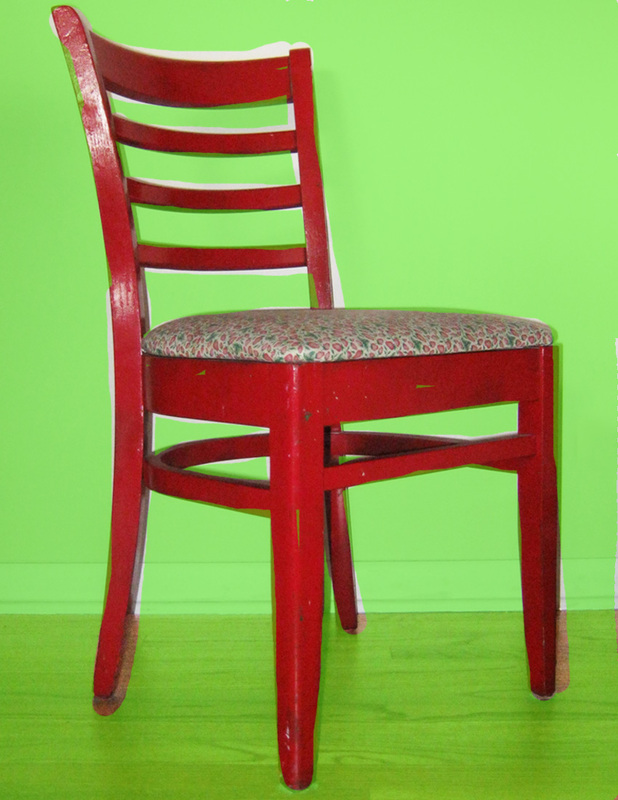
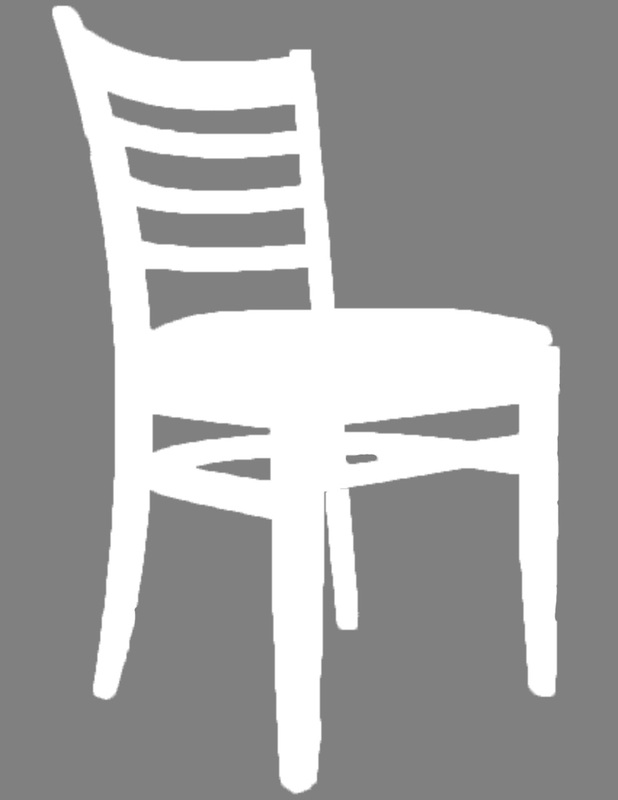
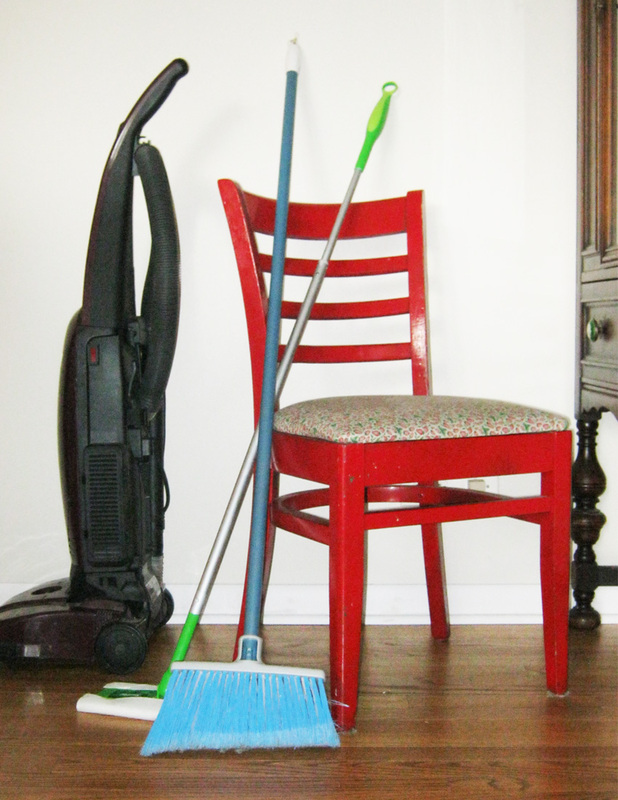
Do a negative space drawing of the chair, below, on the left. You should draw what is highlighted in green. The finished drawing should look like the grey drawing on the right.
Also, the photograph of the chair is of the same proportion as your sketchbook paper. Your drawing should fill the page.
Remember, negative space is the empty space around and between objects in a drawing. When you draw negative space, you are not drawing the object, but what is AROUND the object.
Step 1:
Do a negative space drawing of the chair, below, on the left. You should draw what is highlighted in green. The finished drawing should look like the grey drawing on the right.
Also, the photograph of the chair is of the same proportion as your sketchbook paper. Your drawing should fill the page.
|
|
|
Step 2:
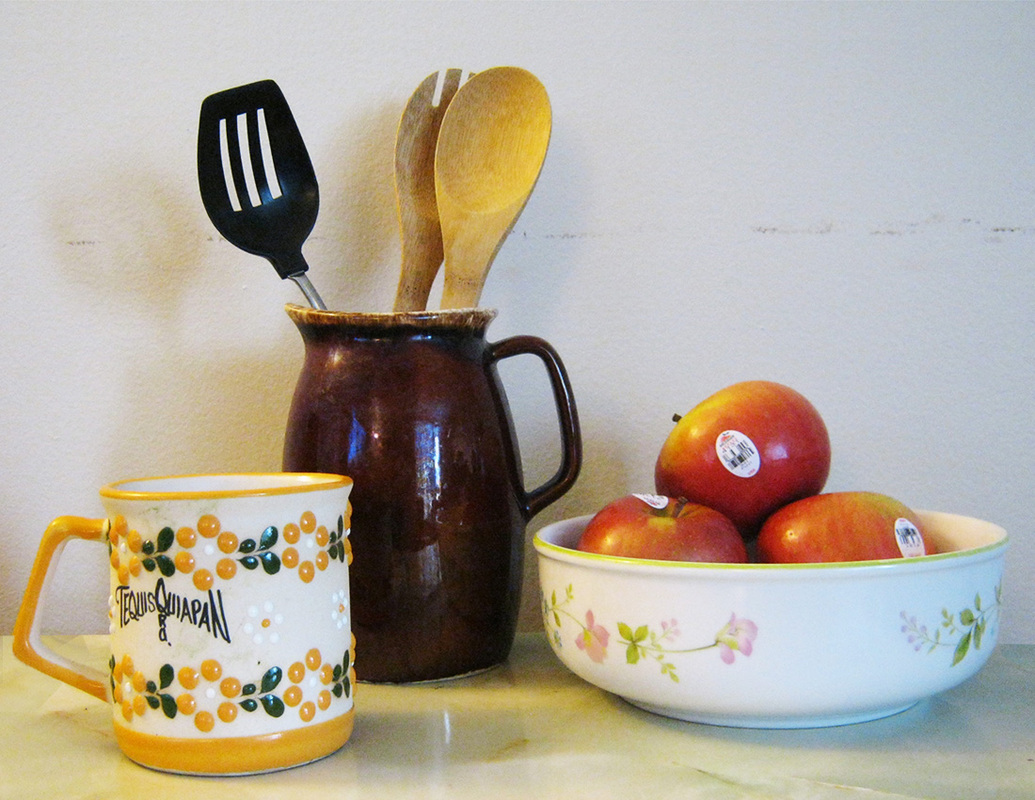
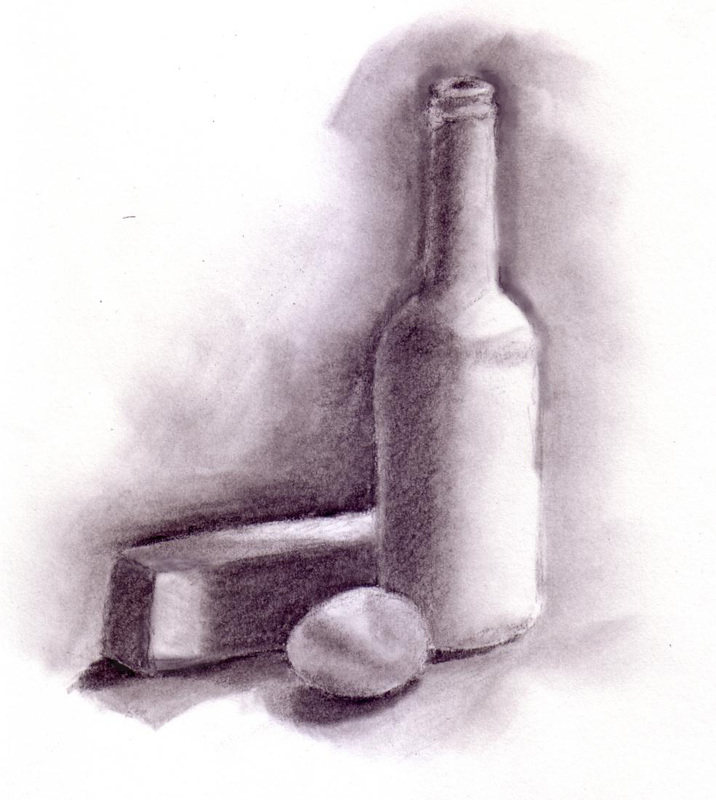
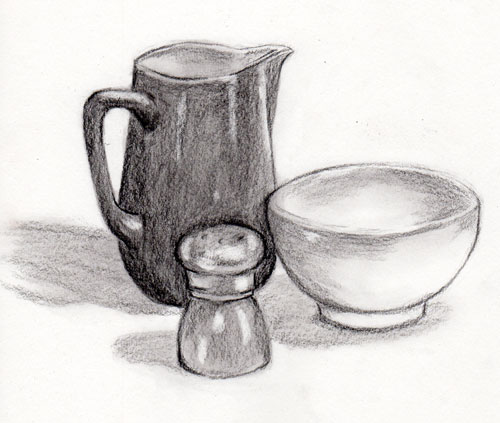
Choose one of the still life arrangements below and do a second negative space drawing. This one will be more challenging! Pay attention to how much space there is between the objects and the edges of the paper. The size of each of the photographs below is of the same proportion as the paper in your sketchbook.
Choose one of the still life arrangements below and do a second negative space drawing. This one will be more challenging! Pay attention to how much space there is between the objects and the edges of the paper. The size of each of the photographs below is of the same proportion as the paper in your sketchbook.
|
|
Tips for Arranging Still Lifes:
|
|
Drawing from Shapes Exercise:
|
|
Breaking down complex objects into simpler shapes makes drawing easier. This technique prevents you from getting lost in the details before you completely layout your drawing. You will have an easier time getting the correct proportions, and filling the page, if you start with large, simple shapes.
How this method works:
How this method works:
- Sketch out the larger shapes you see in the object. Do this lightly. As you do this, check your proportions. Compare the size of one part of the object to another.
- Sketch in medium-small size shapes you see in the object. Do this lightly.
- Refine the edges, and add in details. You are drawing right on top of the sketches. The marks you are making should be darker than the sketch marks.
- You can erase the sketch marks, but a lot of artists like to leave them in the drawing. Also, if you will be shading, the sketch marks will disappear in the shadows.
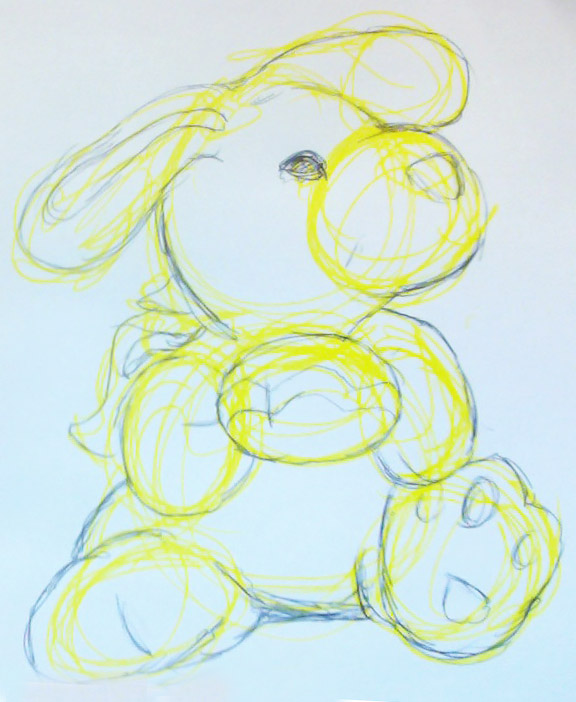
Your Assignment for Day 6:
|
Part 1:
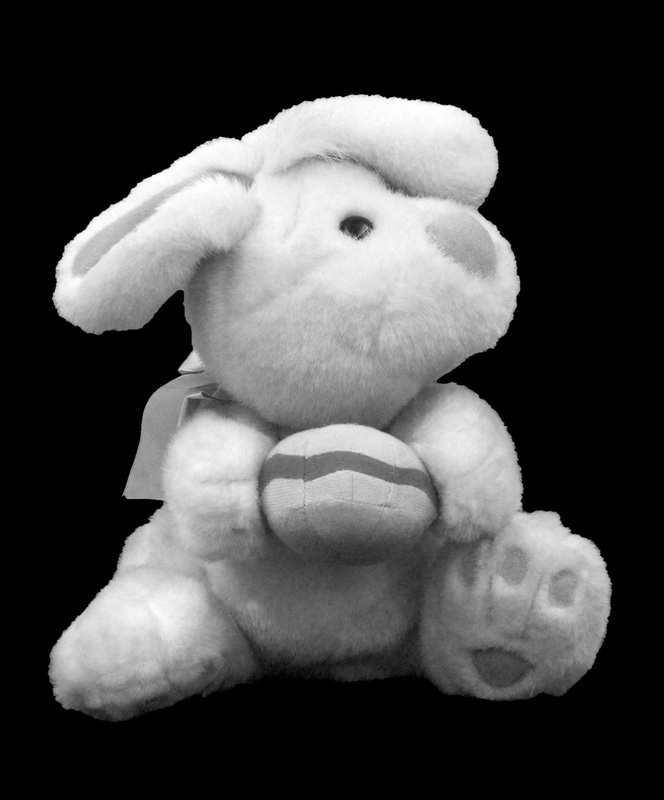
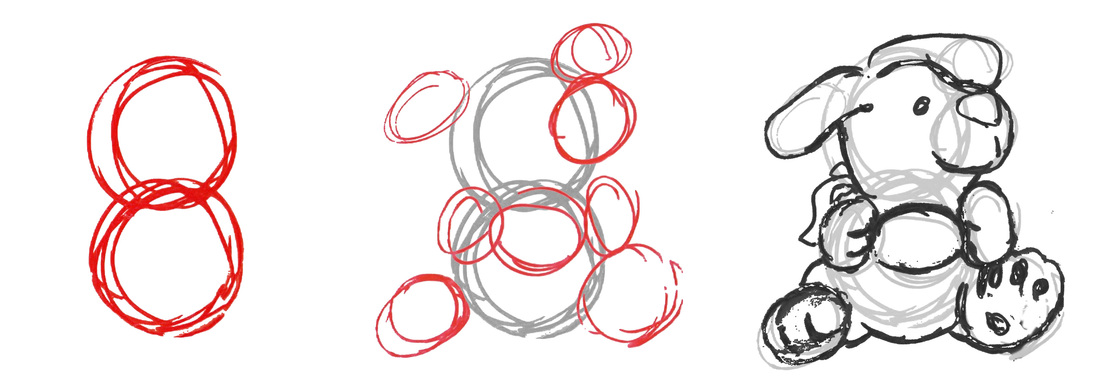
In your sketchbook, divide one page in half. Draw the bunny above on the left side of your sketchbook page using the drawing from shapes method. You will sketch first in YELLOW MARKER. The idea is YOU CAN NOT ERASE! Keep drawing on top of what you have, even if you make a mistake. Just keep drawing. When you have laid out all the basic shapes, you can finish the drawing by adding in details and refining the edges, with pencil. An example is to the right --> Part 2: Choose one of the links below to do a step by step drawing on the right half of your sketchbook page. Use the same method, drawing the basic shapes with yellow marker, and finishing the drawing with pencil.
Part 3: Look for your still life arrangement here. Using a full page in your sketchbook, do a basic layout of your still life arrangement using the basic shapes method from above. If you have time, try refining edges and adding details with pencil. |
Click here for the About.com video on drawing hands.
|
Final Still Life Drawing due 2/18
You are drawing the still life arrangement you took a picture of in class or at home, using the grid system.
- Draw a 7" by 9" rectangle on drawing paper, divided into a 1" grid.
- Line up the gridded transparency paper to the photograph.
- Lightly draw the contours of the still life arrangement, making sure you check proportion and placement (everything you draw should correspond to the grid on the photograph of your arrangement).
- Once you have finished drawing, erase the grid.
- Shade the drawing. There should be NO OUTLINES visible when you are done shading. See instructions below for how to shade this drawing.
Tips for Shading:
- Erase the grid!
- If you are having trouble seeing the different values in your image, you can make the photograph black and white. Go to Tools > Adjust Color and move the slider for Saturation all the way to the left.
- Do NOT use your finger to blend. You can use a blending stump if you like.
- Shade in the background. This is an easy way to create separation between the objects and the rest of the drawing.
- Shade lightly. It is easier to make a value darker that it is to make it lighter.
- Do not scribble in the hair or fur. Pay attention to the direction the hair is moving. Mimic those lines with your pencil marks.
- Use an eraser to bring in highlights.
- Make sure you have a full range of light and dark values.
|
Shade like this!
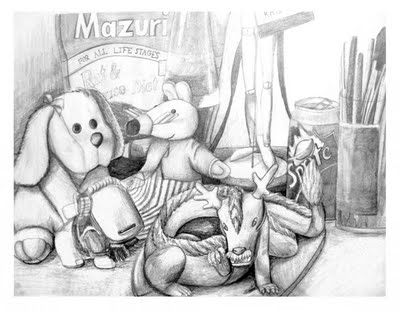
This is an example of a drawing that uses VALUE to create edges. This is how your drawing should be shaded.
|
Not like this. No outlines allowed!
This is an example of a drawing that uses LINE to create edges. You can not shade your drawing this way.
|
Still Life Drawing Benchmarks (10 pts)
- Grid lines are erased (1 pt)
- Contours (shapes or edges of objects) are 80% correct (2 pts)
- Proportions (size) of objects are 90% correct (2 pts)
- Placement of objects is 90% correct (2 pts)
- No outlines visible (2 pts)
- Shading is clean (used a blending stump, not finger tip) (1 pt)
