1 Point Perspective
|
One point perspective, in terms of drawing, is a graphic system which creates the illusion of depth (space, 3D) on a flat surface (like paper).
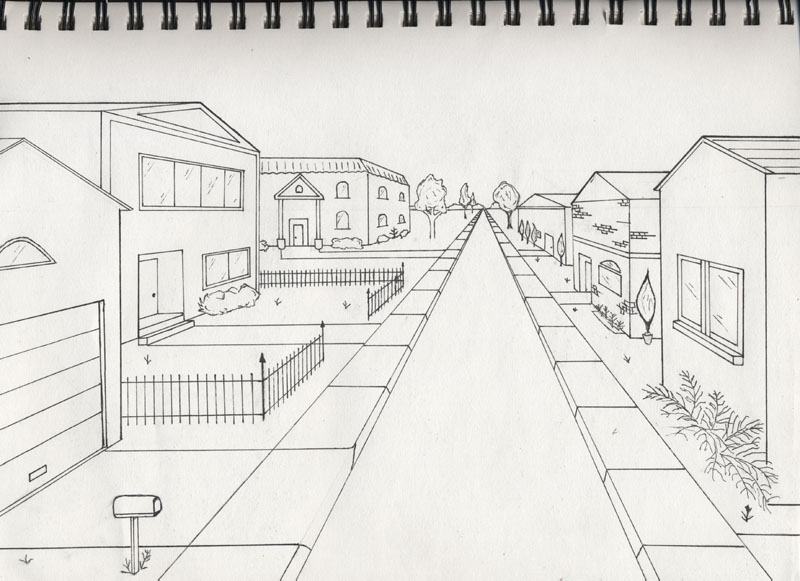
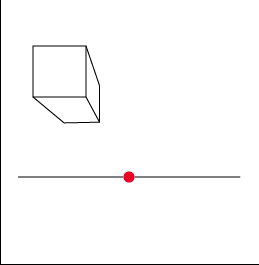
One point perspective starts with a shape, and turns it into a form by making the shape look 3-Dimensional. Every one point perspective drawing uses a vanishing point, a horizon line, orthogonal lines, and horizontal and vertical lines. Horizon line: where they sky meets the land, or eye level Vanishing point: point where objects seem to disappear, or vanish Orthogonal lines: lines that go back into space; they connect the shape to the vanishing point. |
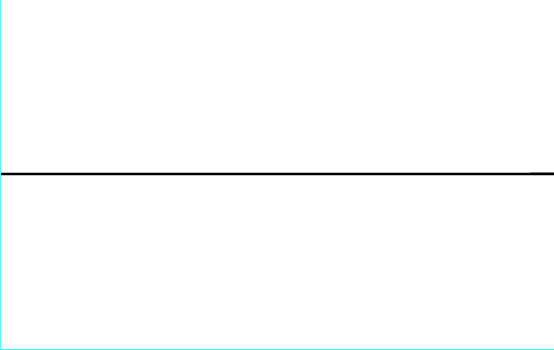
Step 1:
Draw horizon line and vanishing point. |
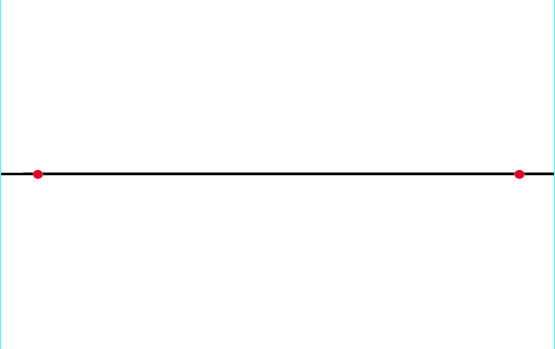
Step 2:
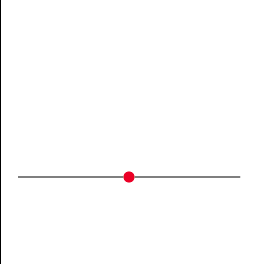
Draw your shape. |
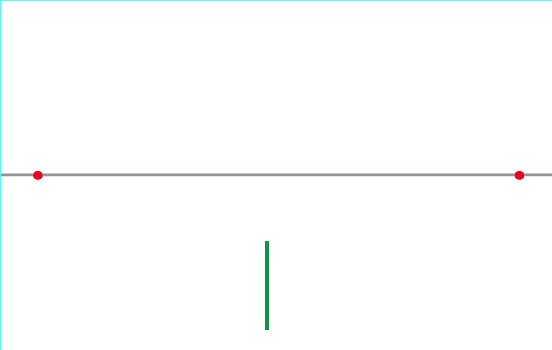
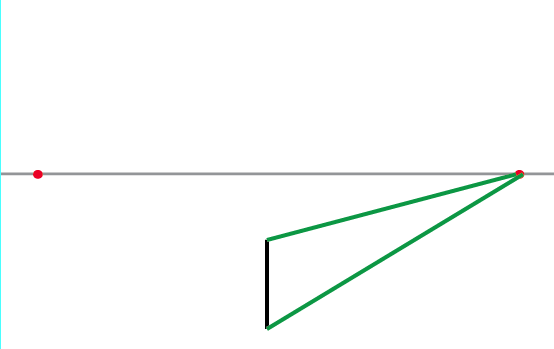
Step 3:
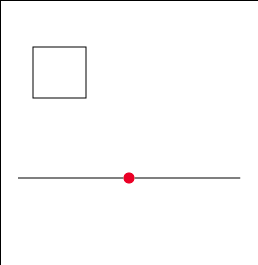
Draw orthogonal lines connecting the corners of the shape to the vanishing point. *Do not draw an orthogonal line if it crosses completely over the shape. |

Step 4:
Close up the shape by drawing lines parallel to the edges of the shape. |
Step 5:
Erase the part of the orthogonal lines that are no longer part of the shape. |
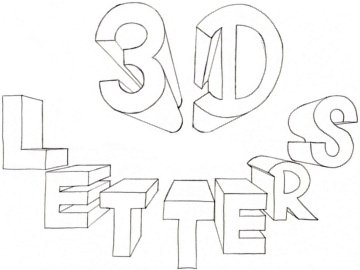
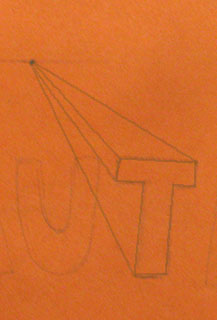
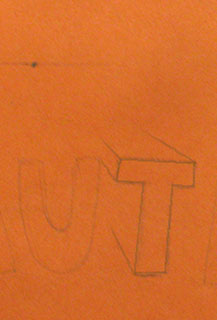
3-D Words in One Point Perspective
|
For our next project, we will choose a short phrase to write in one-point perspective. The final version will be shaded with colored pencils.
First, choose a phrase to write in one point perspective.
If you need some ideas for a phrase, click on the link below: www.joe-ks.com/phrases/phrases.htm |
|
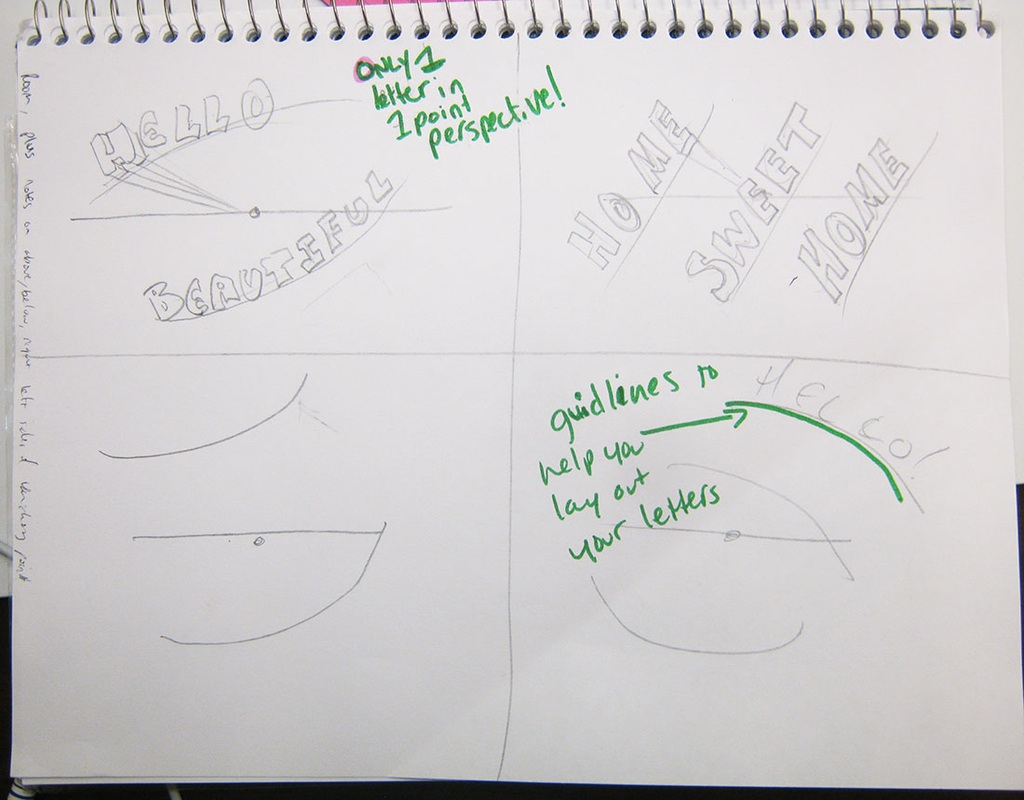
Second, do four sketches in your sketchbook of different ways to lay out your phrase.
|
|
Notice the letters, horizon line, and vanishing point are drawn fairly lightly.
|
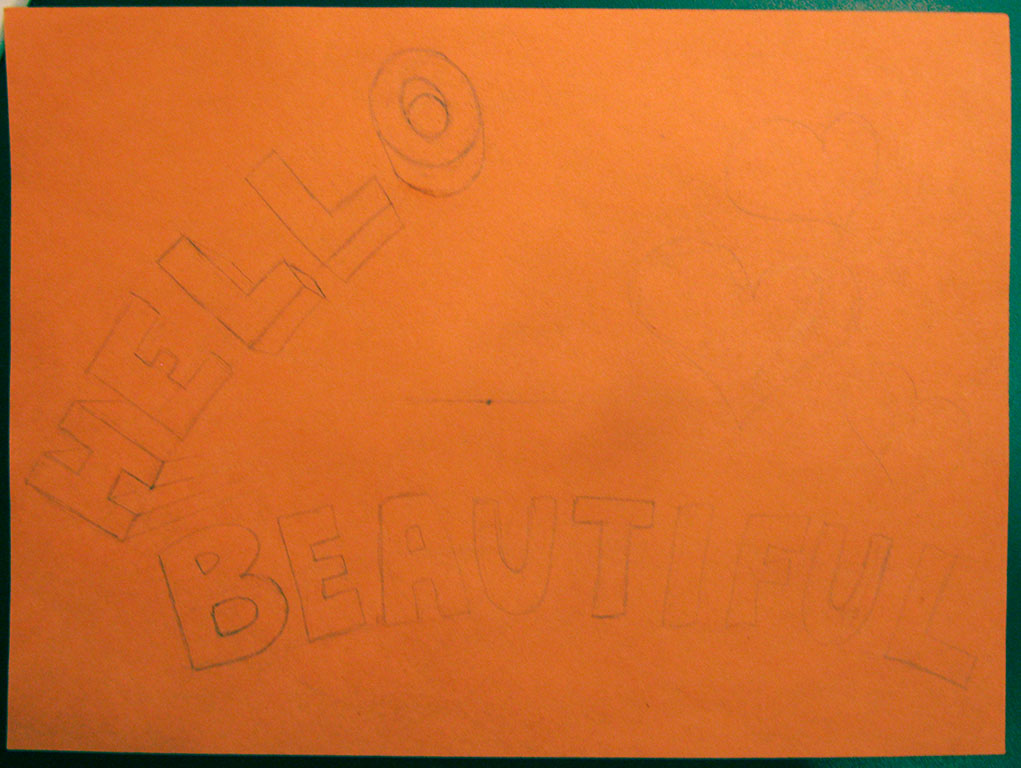
Third, choose one of the four sketches to draw on a piece of drawing paper.
|
|
Fourth, color in the letters.
|

|
3D Letters Benchmarks (10 pts)
- Extra lines are erased neatly/design drawn lightly in pencil
- Letters go above and below horizon line
- Design fills the page
- At least 12 letters
- Lines that close shape are parallel
- All visible parallel lines are drawn
- Orthogonal lines connect letter to vanishing point
- All visible orthogonal lines are drawn
- Letters are colored in neatly
- Letters are colored in according to directions above (light, med, dark)
Drawing a Room in 1 Point Perspective
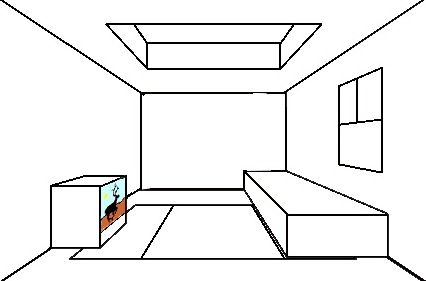
Your drawing from the website should look like this

|
We will be doing a drawing of a bedroom in 1 point perspective.
This website is a great resource for drawing basic objects in a room: http://www.olejarz.com/arted/perspective/start2.html 11/19/13
Before beginning the final drawing, please follow the tutorial at the link above, completing the t.v., the bed, the window, the rug, and the skylight, on a new page in your sketchbook (I believe this is page 23). |
|
Requirements for final drawing of Bedroom:
You will draw a room in 1 point perspective. Draw LIGHTLY. You will be coloring this drawing with colored pencil. You must include the following:
The above is just the minimum. Part of your grade comes from working on this project everyday. |
Benchmarks for 1 Pt Perspective Room drawing (10 pts)
|
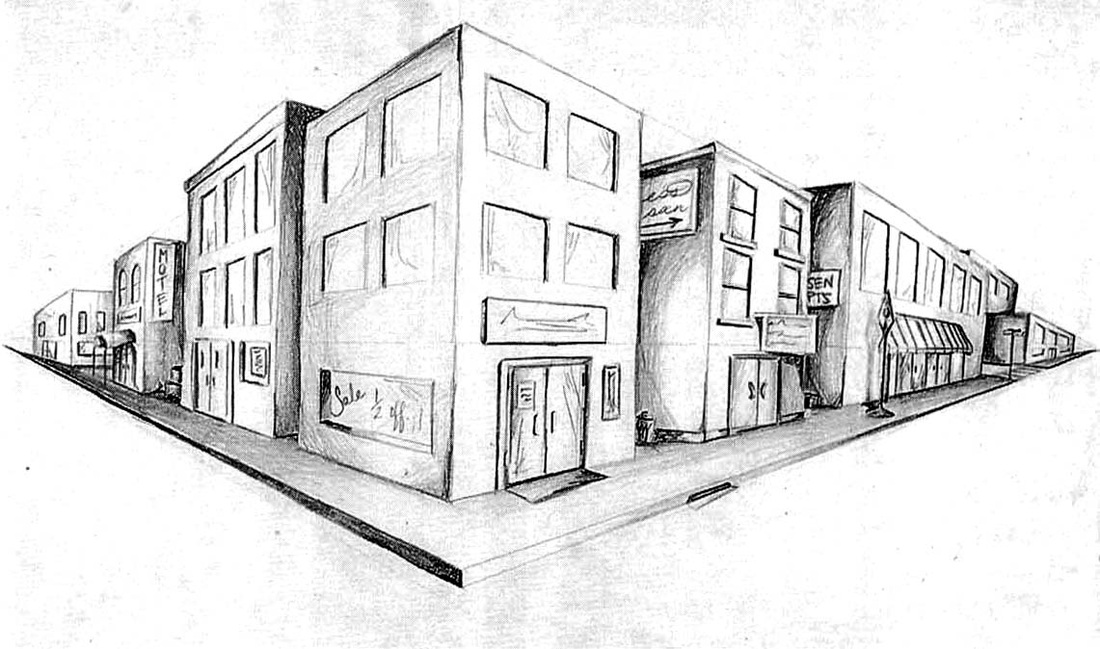
Two Point Perspective
|
Like one point perspective, two-point perspective is a method of drawing that creates the illusion of depth (space, 3D) on a flat surface (like paper).
Two point perspective starts with a line (called a leading edge), and turns it into a form by making the shape look 3-Dimensional. Every one point perspective drawing uses a TWO vanishing points, a horizon line, orthogonal lines, and vertical lines. Horizon line: where they sky meets the land, or eye level Vanishing point: point where objects seem to disappear, or vanish Orthogonal lines: lines that go back into space; they connect the shape to the vanishing point. Leading Edge: the edge of the shape closest to the viewer. This is the first part of the shape you draw. |
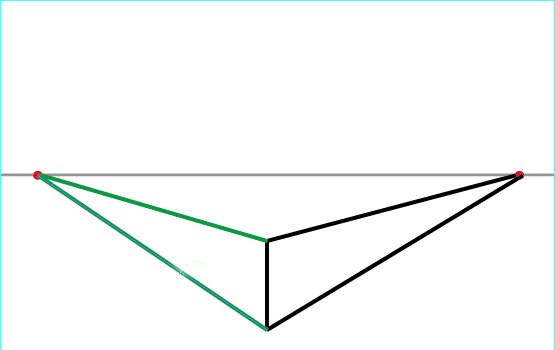
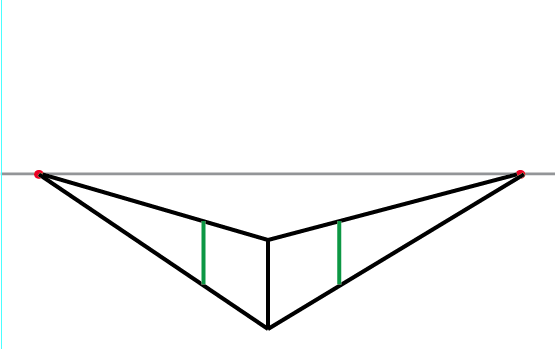
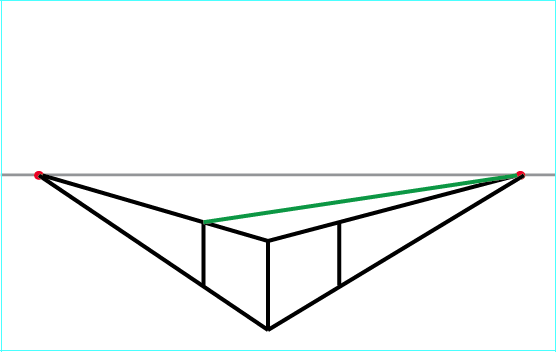
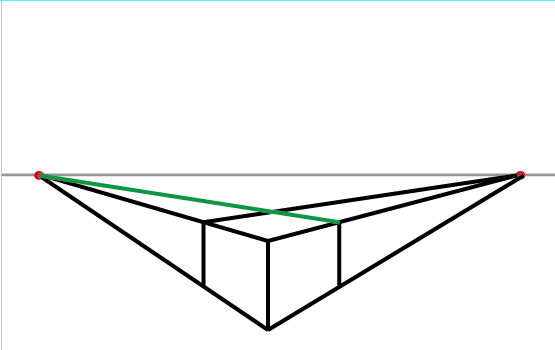
Two point perspective in 9 steps:

|
Requirements for Buildings in 2 pt Perspective
|
Benchmarks for Buildings in 2 pt Perspective (15 pts)
|
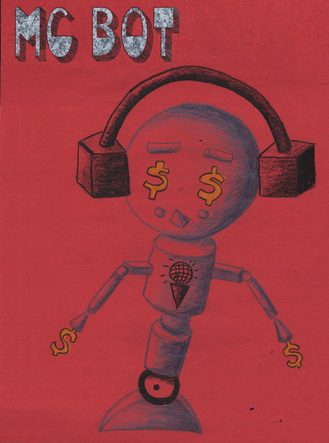
Robots (Drawing Form)
|
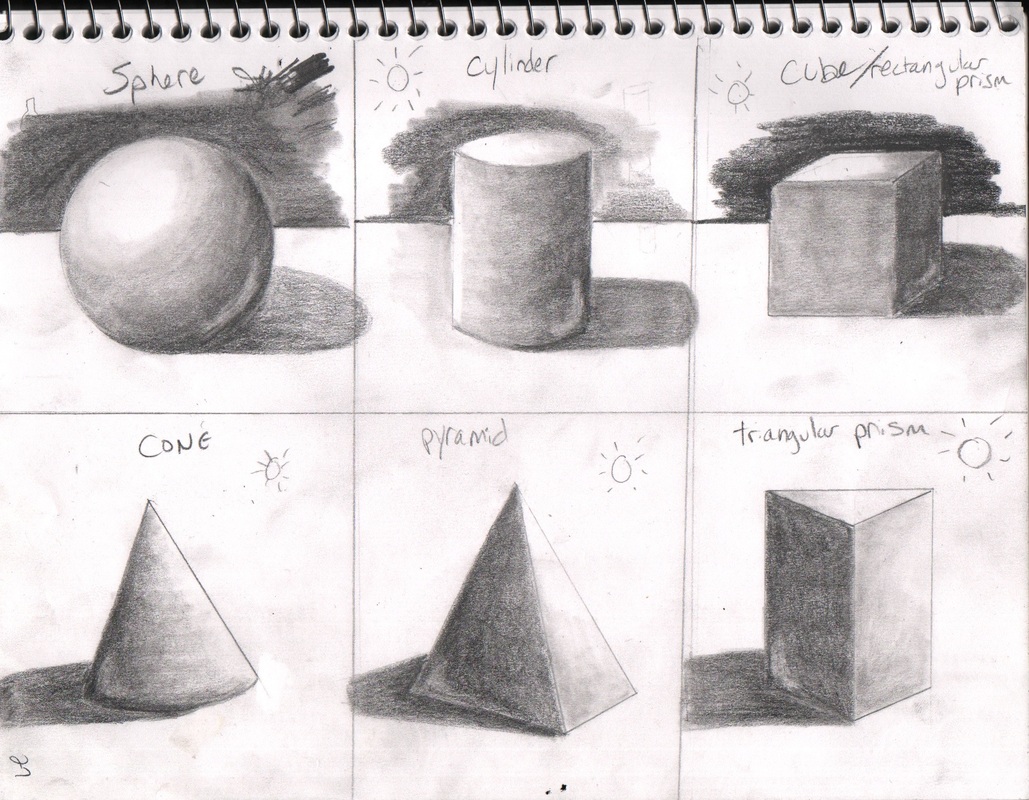
We have learned how to draw six basic geometric forms, using shading (value) to create a three dimensional-looking drawing.
When shading, it is important to identify your light source. The part of the object closest to the light will have a highlight. The part of the object opposite of the light source will have the darkest shadow. To create a realistic drawing, shade so that the highlight gradually changes into the shadow (you should have many gray tones in between the highlight and shadow). Erase a bit from on the darkest side of the object to create an area of reflected light. Last, draw a cast shadow on the table or surface the object is sitting on. |
|
You will use those six basic forms- sphere, cube, cylinder, cone, pyramid, and prism (triangular/rectangular) to design your own robot.
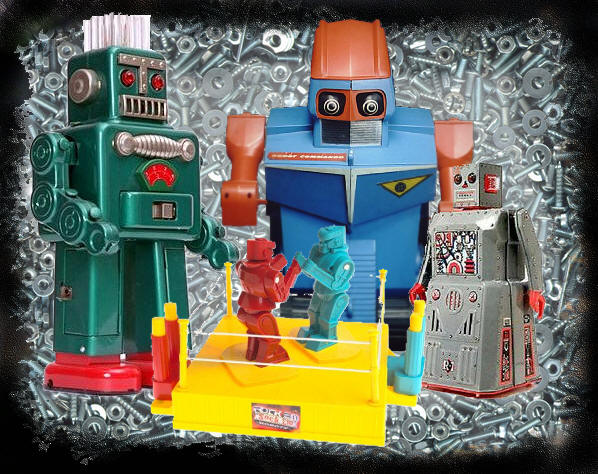
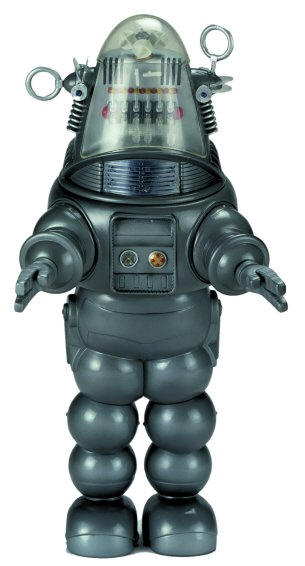
Your robot must serve a specific purpose or perform a specific function, and does NOT have to be a humanoid.Robots have been featured in movies and television, but exist in the real world, too. Sometimes they are destroying human kind, other times they are serving it. So, what kind of robot can you design? Any kind you want (school appropriate), but 50% of it must be drawn from the forms we've learned to draw. Some inspiration for you in the galleries below... |
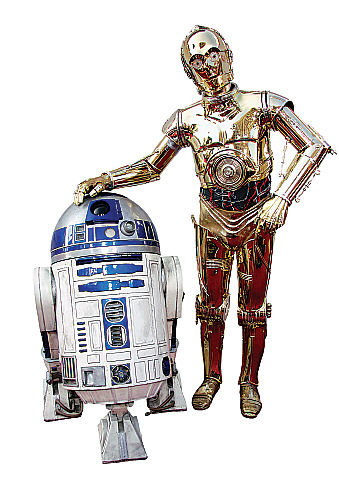
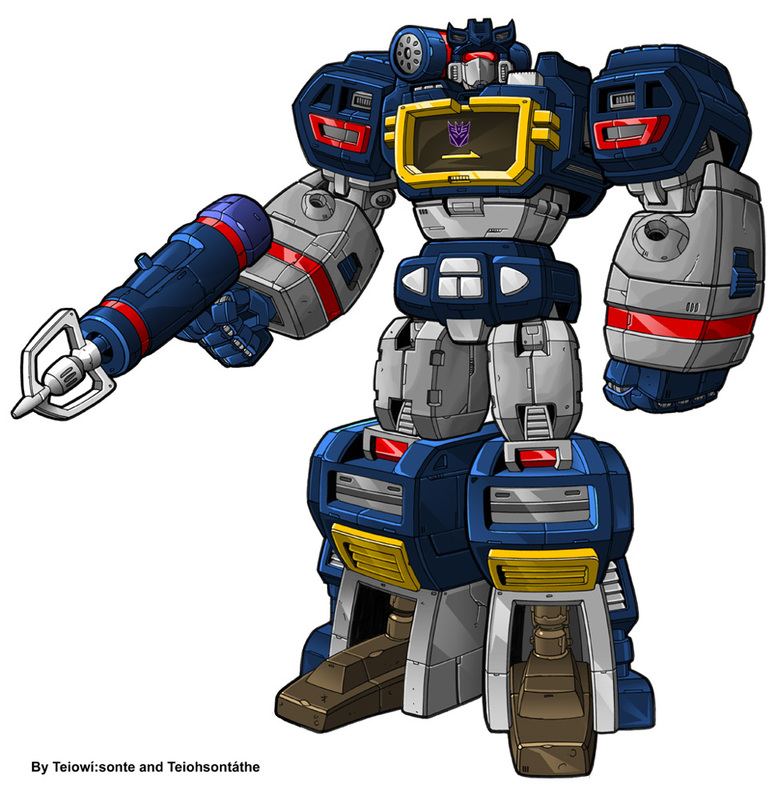
Robots from the movies...
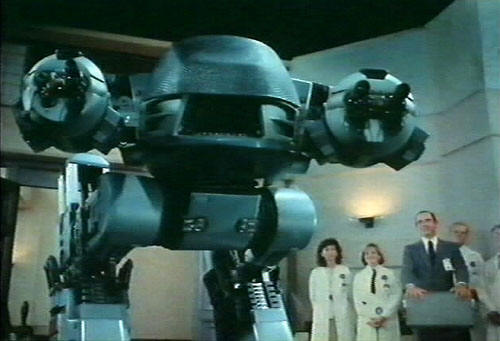


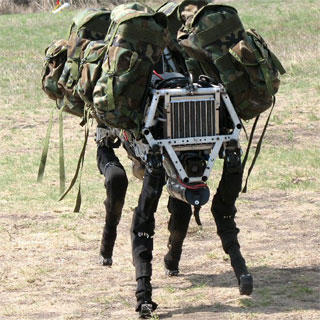
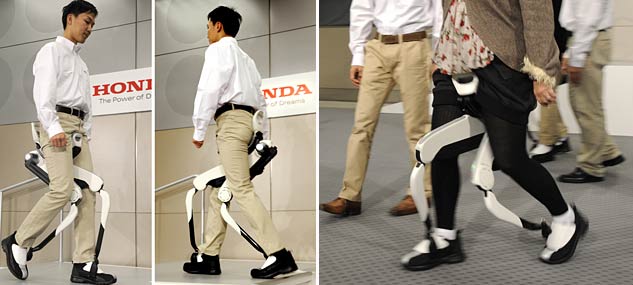
... and real-world robots.


|
Requirements for Robot (10 pts):
Use the web for inspiration! Google "robot drawing" for some great examples... but NO COPYING! |
|
2 Day Project (6pts) OR Benchmark Make-Up
If you have completed all of the projects for this class, then choose one of the short projects listed below to complete in your sketchbook. The short project will be due at the end of class Friday.
If you have missing projects, you will be excused from the assignment above, but you MUST use the next two days as benchmark make-up days.
If you have missing projects, you will be excused from the assignment above, but you MUST use the next two days as benchmark make-up days.
- If you do not use all of your class time, you will NOT be excused from the above project, and will receive zero points instead.
- If you are missing one project and finish before the end of the day today, you will be expected to finish one of the short projects listed below by the end of class tomorrow.
Short Project Option 1: Fractured Values Drawing
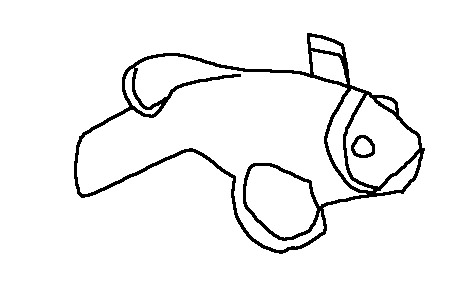
First, in your sketchbook (mine would be on pg 28), draw an object large enough that it fills 80% of the paper. Do not draw a lot of small detail.
|
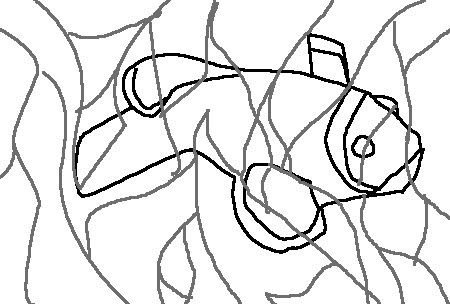
Second, draw 20-30 lines that cross over each other and the object.
|
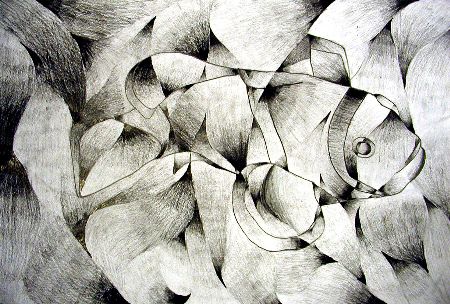
Last, shade each section created by overlapping lines and objects, alternating the direction of light to dark. Shading should be a gradual change from one value to the next. Due end of class Friday.
|
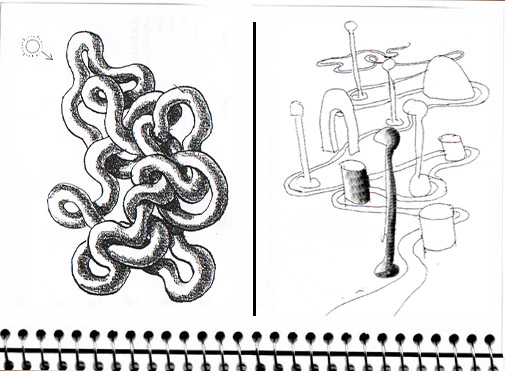
Short Project Option 2: Shaded Tangle and Fantasy Landscape
|
You will do two, single-day exercises in your sketchbook. Divide a page in your sketchbook in half. On one half, do the Day 1 exercise, the Shaded Tangle. On the other half the page, do the Fantasy Landscape exercise.
I used page 28 in my sketchbook (see image on left). The left half is the Shaded Tangle, and the right half is the Fantasy Landscape. Directions for each exercise are listed below. BOTH the Shaded Tangle and the Fantasy Landscape are due Friday. |
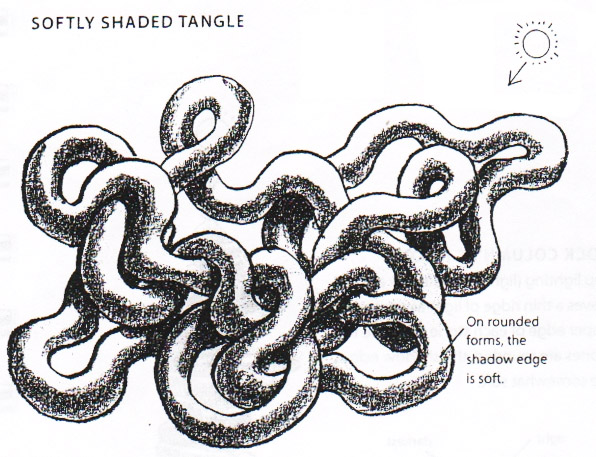
Option 2, Day 1: Shaded Tangle
|
On one half of a page in your sketchbook...

First, fill a page with loops, according to the steps above.
Next, shade in the loop design. Shadows will be darkest when one loop is under another. Finish by end of class Thursday. |
Option 2, Day 2: Fantasy Landscape
|
On the other half of a page in your sketchbook...
|
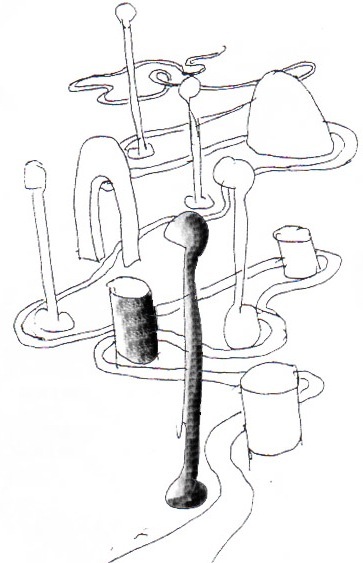
Last, shade in your objects and road.
|
Semester 1 Final Project, 15 pts
Your final project will be a culmination of most of the ideas and techniques we have learned in class this far. This project will look something like a collage that combines drawing with pencil, colored pencils, maker, and cut paper. The subject matter (what the project s about) is up to you, as long as it is school appropriate - nothing drug or gang related.
You will earn a point for each day you are working on the final; these points are worth almost 50% of the project grade. Not working on your project the entire period everyday could result in you failing the project.
Your project must incorporate in some way:
You must also:
Remember, you MUST meet ALL of the requirements listed above, including working on your project EVERY DAY (you can not "finish early").
EXCEPTION: If you are missing ONE assignment, you can use ONE DAY for benchmark make-up. If you are missing TWO projects or more, you can use TWO DAYS for benchmark make-up. You can only make-up benchmarks if you have completed the final project.
You will earn a point for each day you are working on the final; these points are worth almost 50% of the project grade. Not working on your project the entire period everyday could result in you failing the project.
Your project must incorporate in some way:
- 2 sketches of ideas for project, in your sketchbook (1 pt)
- A doodle pattern (like from the Doodle Project) (1 pt)
- Cut paper (like from the Molly Bang project) (1 pt)
- A shape or object that tessellates 3 times (1 pt)
- Something drawn in one or two point perspective (1 pt)
- At least three of the geometric forms we learned to draw, shaded (1 pt)
You must also:
- fill the entire page (2 pts)
- work on project EVERYDAY (7 pts)
Remember, you MUST meet ALL of the requirements listed above, including working on your project EVERY DAY (you can not "finish early").
EXCEPTION: If you are missing ONE assignment, you can use ONE DAY for benchmark make-up. If you are missing TWO projects or more, you can use TWO DAYS for benchmark make-up. You can only make-up benchmarks if you have completed the final project.
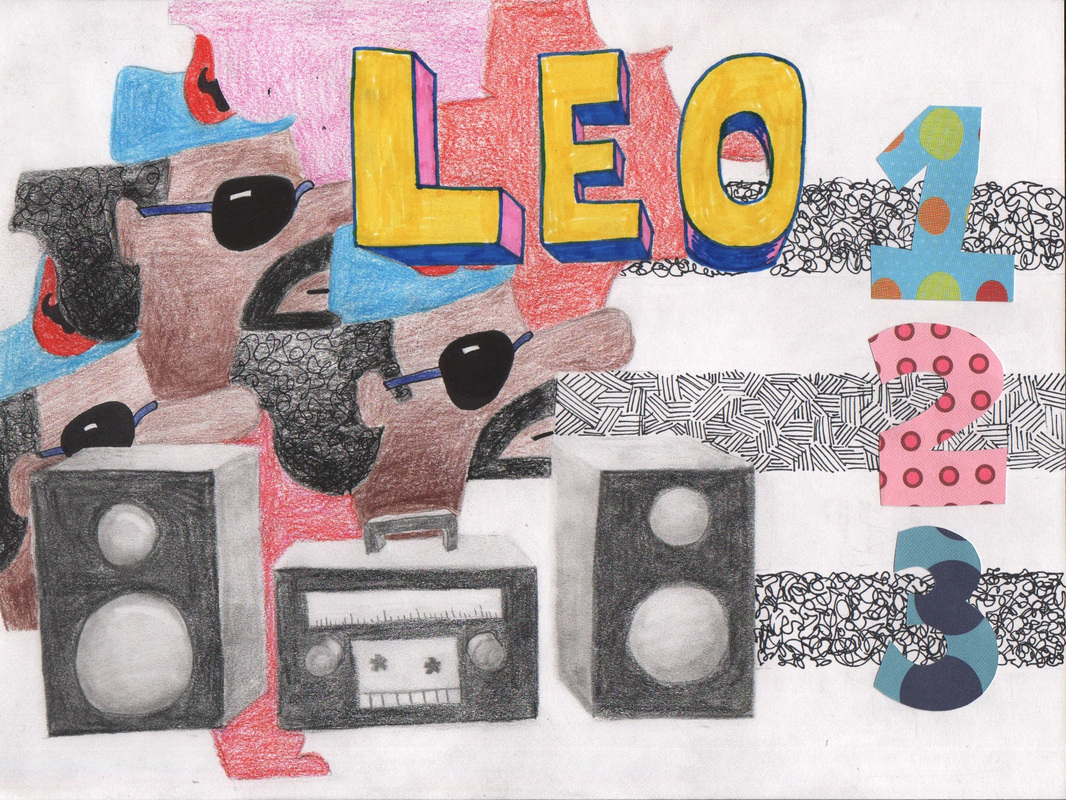
The final project, completed.
|
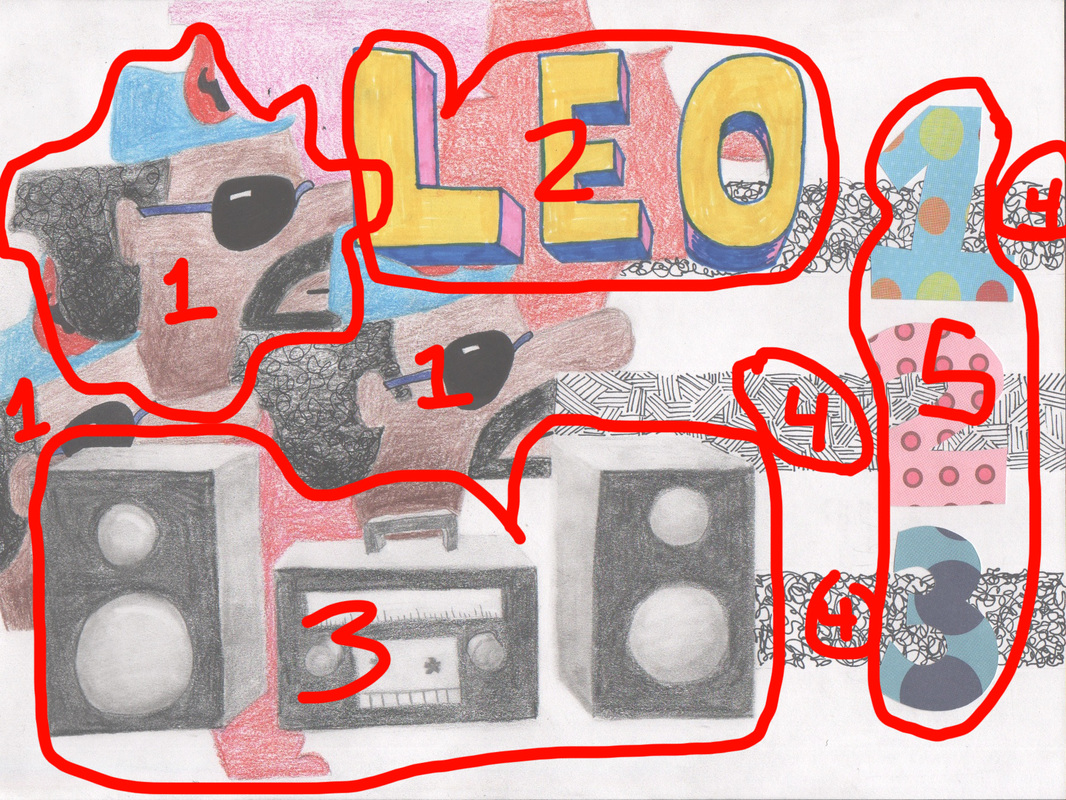
1. Tessellation, 2. One point perspective, 3. Geometric forms, shaded, 4. Doodle, 5. Cut paper
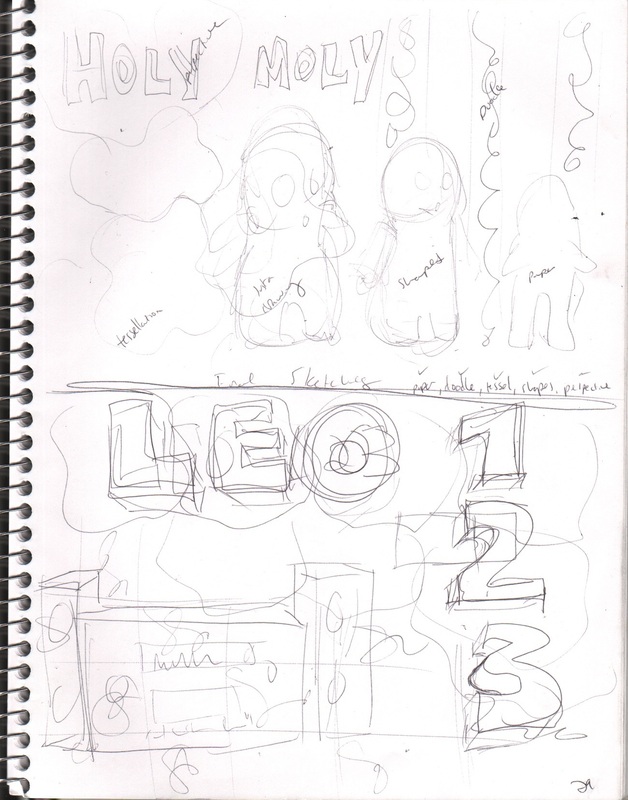
My two sketches. I used the bottom sketch for the final.
|
