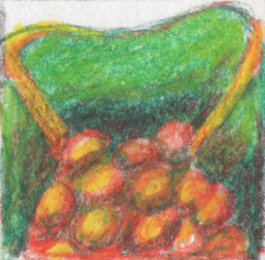
Weave Portraits
Our next project will be a drawing we make by weaving two photographs together. The first photograph will be a self portrait. The second photograph will be a collage we make on the computer. Follow the steps below to make your collage.
|
Step 1:
Download the file to the left. Drag the file to your desktop, and double clink to open it. | ||
Step 2:
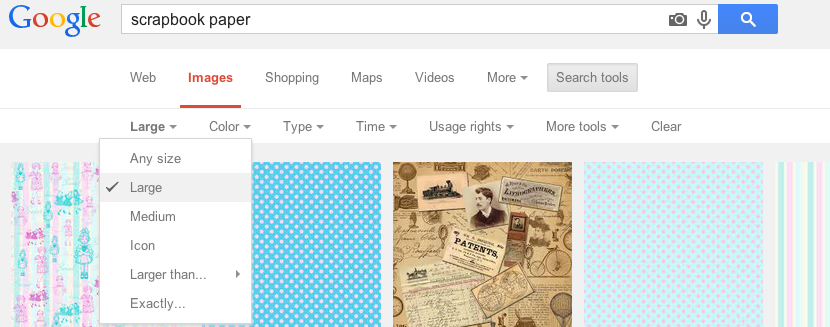
Do a google search for "scrapbook paper"
Click on "Search tools"
Click on "Size"
Choose "Large"
Do a google search for "scrapbook paper"
Click on "Search tools"
Click on "Size"
Choose "Large"
Step 3:
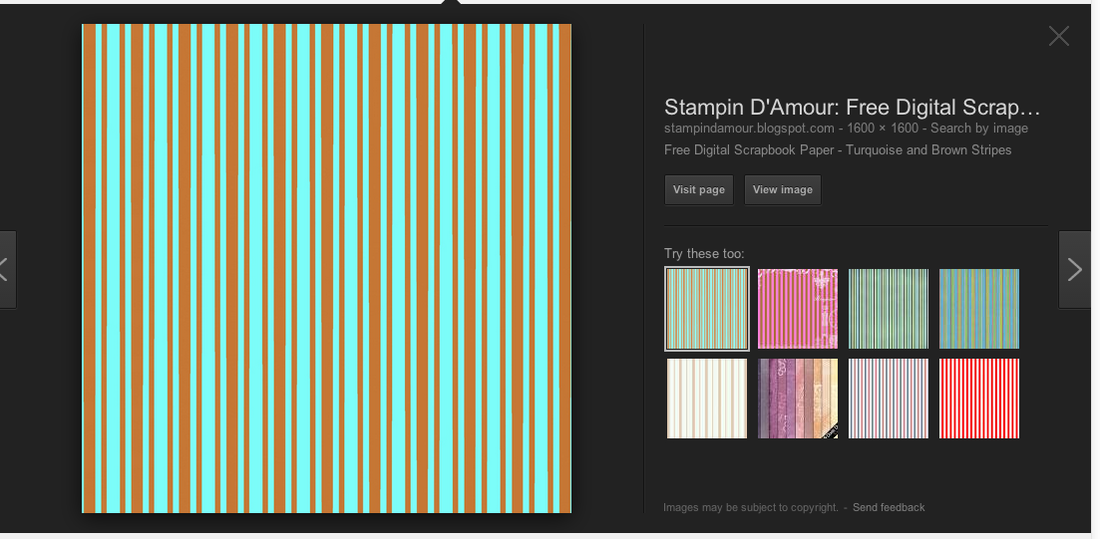
Find a pattern you like.
Click once on the thumbnail to make it bigger.
Drag the picture to the open document (its called a "pages" document)
Find a pattern you like.
Click once on the thumbnail to make it bigger.
Drag the picture to the open document (its called a "pages" document)
|
|
Step 4:
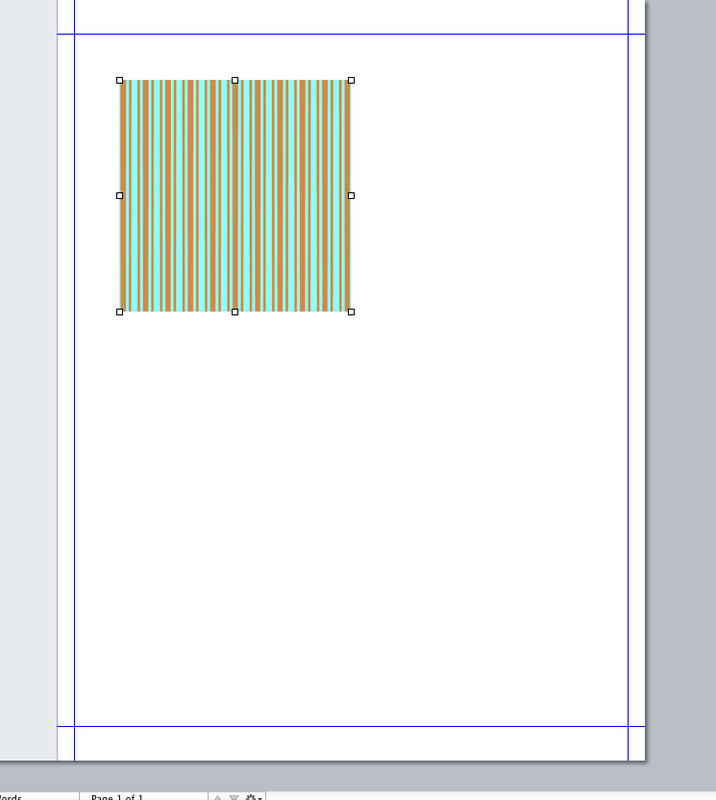
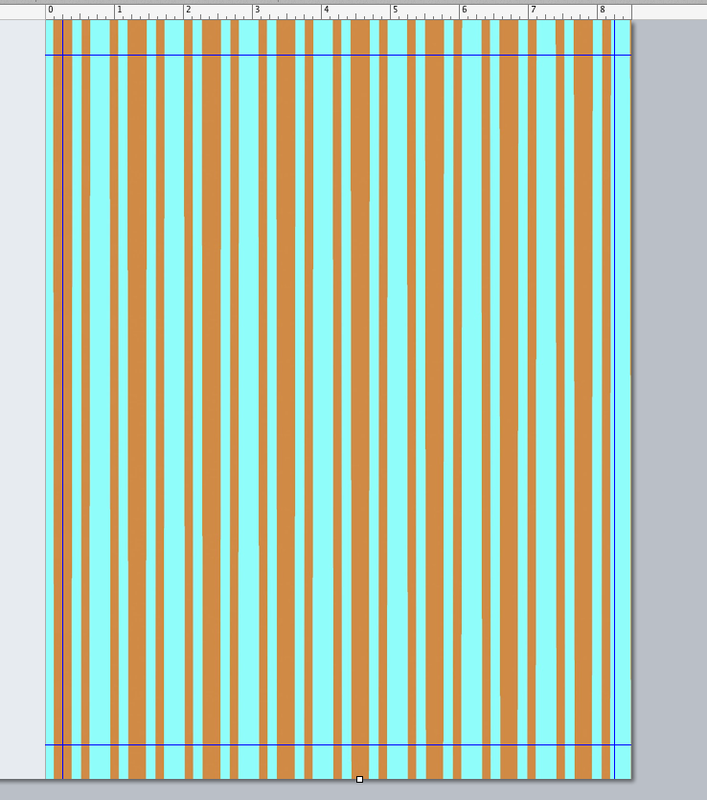
Once the pattern picture is in the pages document, click on a corner and resize the picture until it covers the whole page. |
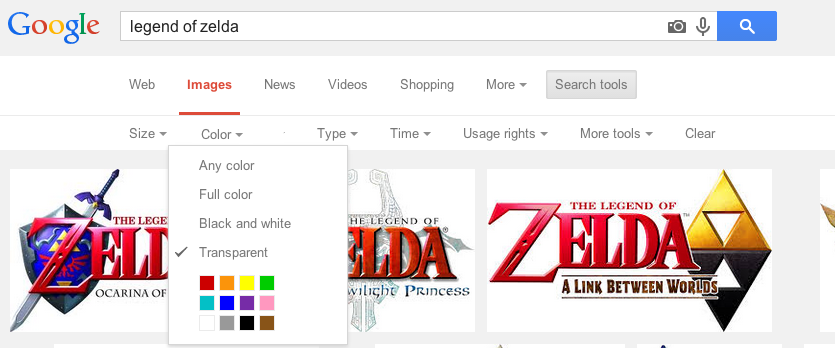
Step 5:
Do a google image search for something you like.
Click on "Search tools"
Click on "Color"
Click on "Transparent"
This will give you images in a clear background.
Do a google image search for something you like.
Click on "Search tools"
Click on "Color"
Click on "Transparent"
This will give you images in a clear background.
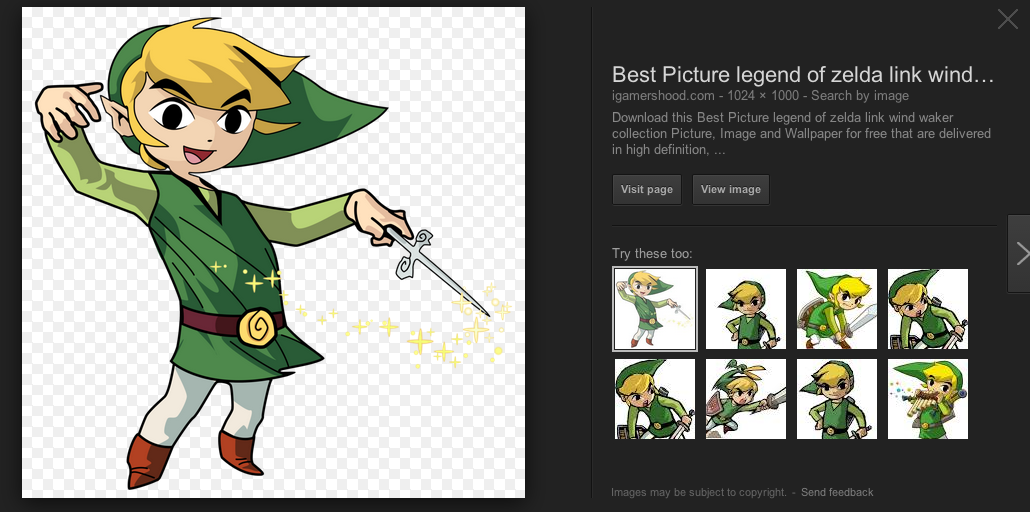
Step 6:
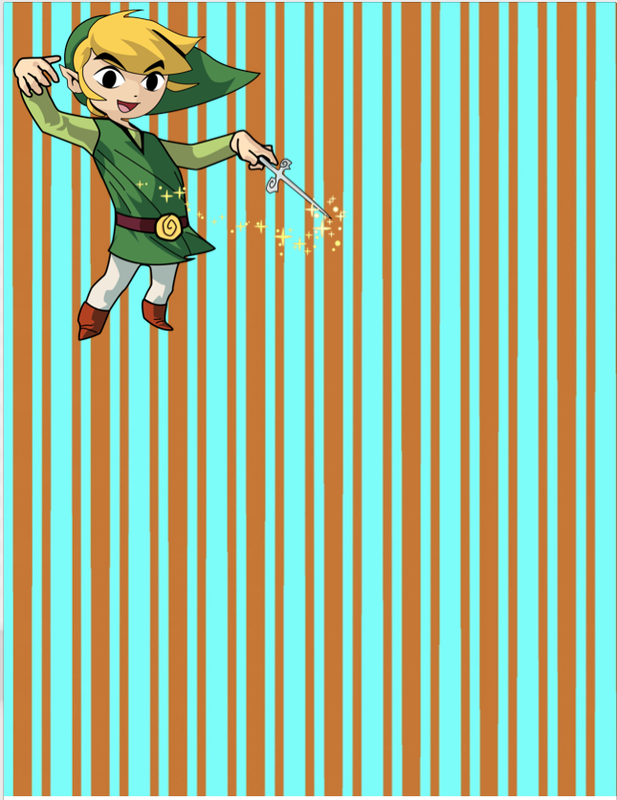
Find an image you like.
Click on the thumbnail to make the image bigger.
NOTE: the grey and white squares in the background means the background is transparent.
Find an image you like.
Click on the thumbnail to make the image bigger.
NOTE: the grey and white squares in the background means the background is transparent.
Step 7:
Click and drag the image to the open Pages document.
Resize the image as needed.
Repeat step 6 and 7 until you have filled the document with images- at least 7.
ITS OKAY TO OVERLAP IMAGES!
Click and drag the image to the open Pages document.
Resize the image as needed.
Repeat step 6 and 7 until you have filled the document with images- at least 7.
ITS OKAY TO OVERLAP IMAGES!
|
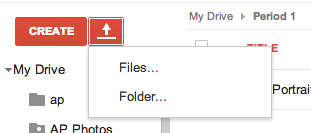
Step 8:
Upload the file to the Google Drive
|


Weave Portraits, Part 2:

|
Next, you will weave your photo and your collage page together.
|
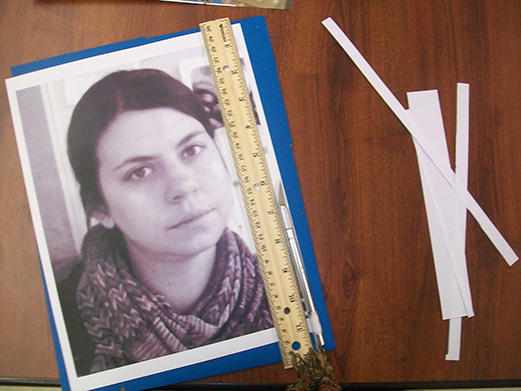
Step 1:
Cut of edges of photo. Your portrait should be 8"x 10" |
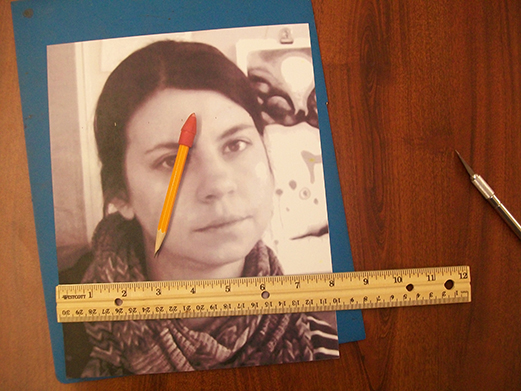
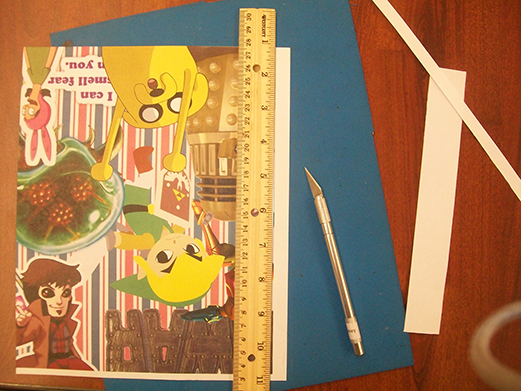
Step 2:
Divide the page into 1' columns. Make marks every one inch across the top, and again at every inch across the bottom. |
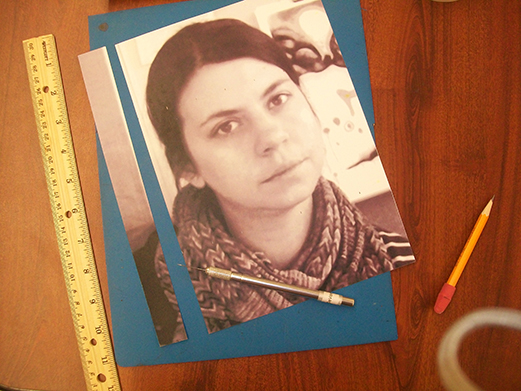
Step 3:
Line up the ruler with the marks you made in Step 2, and use an exacto knife to cut your portrait into 1" strips vertically. |
Step 4:
Cut your collage page down to an 8" by 10" rectangle. |
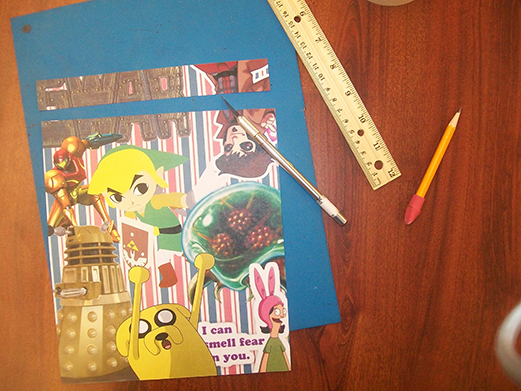
Step 5:
Divide the page into 1" rows, like you did in Step 2. Cut the collage page into 1" strips horizontally. |
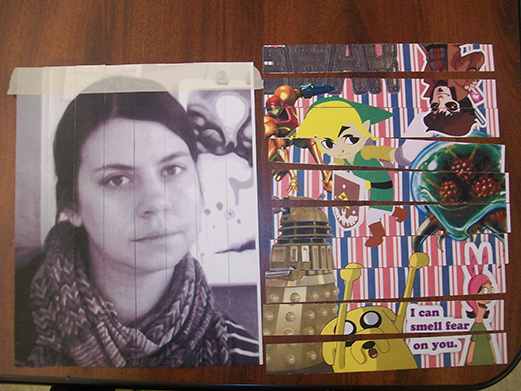
Step 6:
Line up your photo strips, and put a pice of making tape along the top. |
Step 7:
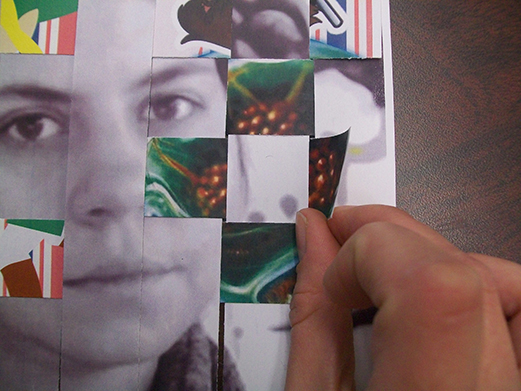
Start with the SECOND STRIP from the top of your collage, weave the strip into your portrait. |
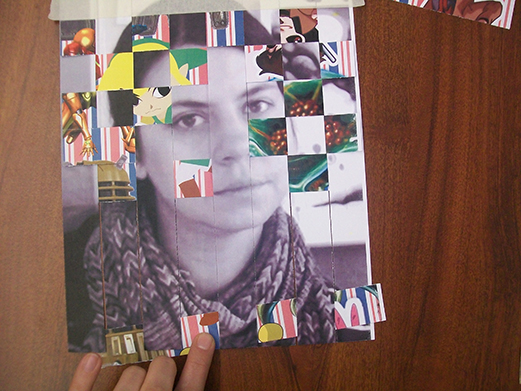
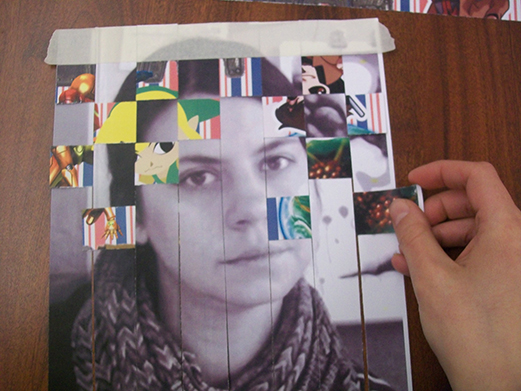
Step 8:
Continue weaving in the strips, making an IRREGULAR pattern. Remember, you can only conceal up to 75% of your face... one eye, part of your nose, OR part of your mouth. |
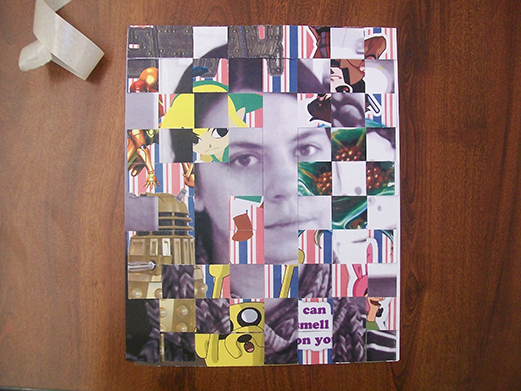
Step 9:
Carefully remove the piece of tape across the top, and weave in the top strip of the collage page. |
Step 10:
Tighten and align your weaving strips. Glue your weaving, going along the top, bottom, left and right edges. |
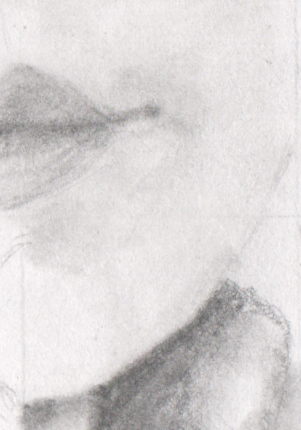
Weave Portraits, Part 3:
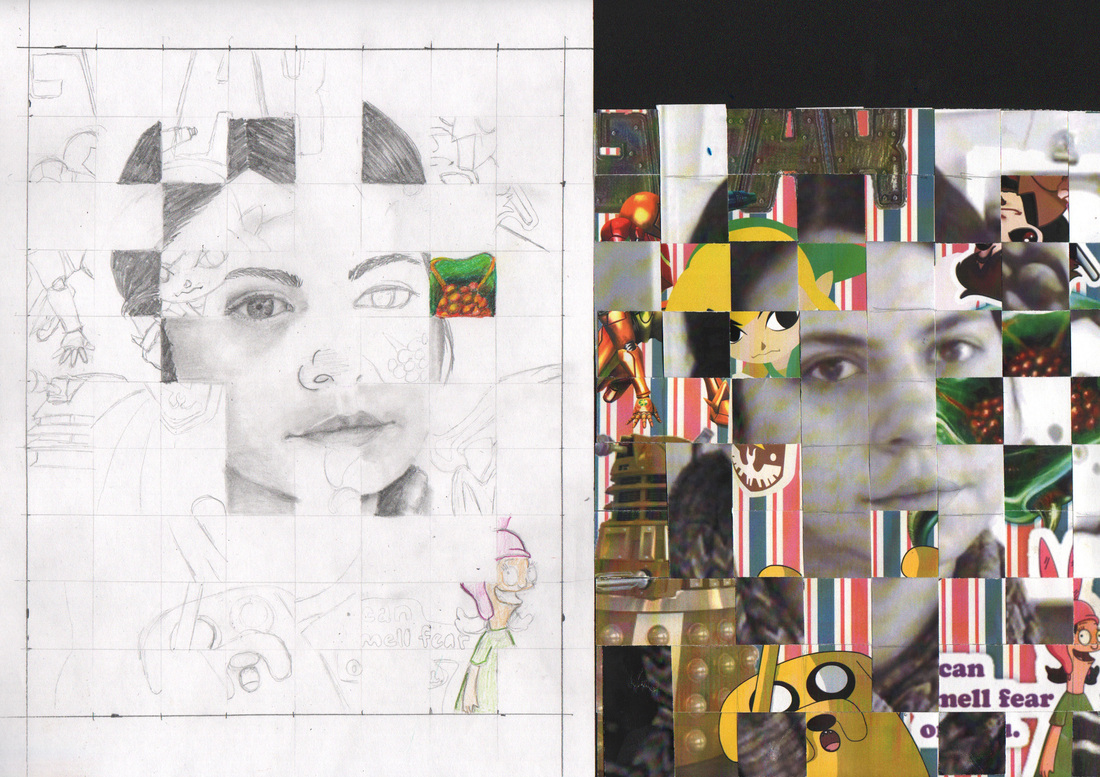
The last step of this project is to draw what you see in your weaving.
Step 1: Draw a 1" border across the top of your paper.
Step 2: Draw a 1/2" border on the left side of the paper.
Step 3: Draw an 8" by 10" rectangle.
Step 4: Divide the rectangle into a 1" grid. DRAW LIGHTlY
Step 5: Draw what you see in your weaving.
Step 6: Shade in the parts of the drawing that are your face.
Step 7: Color in the parts of the drawing that are the collage.
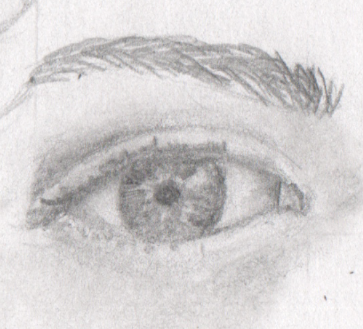
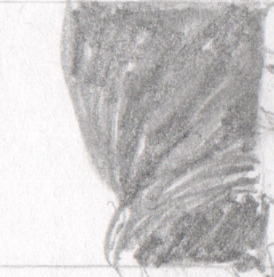
Weave Portraits, Coloring and Shading:
When Shading:
When Coloring:
- create smooth values, no pencil visible pencil marks allowed! (using a blending stump will make that easier)
- no outlines! use a difference in value to show two parts of the image
- the only parts of your face that should be white are the white of your eyes and any highlights (like on the tip of your nose, chin, maybe on your forehead)
- shade in the iris of the eye they way we learned in our sketchbook
- shade the hair the way we learned in our sketchbook- your pencil marks should mimic the strands of your hair
When Coloring:
- layer colored pencil to create a rich look
- very little white of the paper should show through the colored pencil
|
|
|
Color Theory
|
We will be learning about color theory for the next week, which means we are painting!
Click below for the presentation about color theory and for the answers to the questions on your worksheet. http://prezi.com/nwbrmnmvjegn/?utm_campaign=share&utm_medium=copy&rc=ex0share |
Color Scheme Watercolor Painting
You will create a project that explores different colors schemes. You will begin by making a small drawing, and repeating the same drawing 6 times on a piece of water color paper. Once you are done transferring the drawing, you can begin painting, according to the chart below:
|
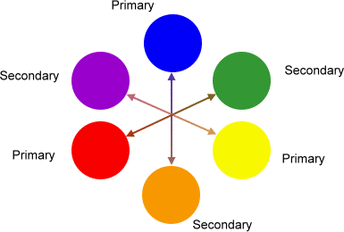
Analogous Color Scheme:
A color scheme that uses colors next to each other on the color wheel. In this box, you will paint your drawing using an analogous color scheme. Also experiment using the tints and shades of the colors you chose. |
Complementary Color Scheme:
A color scheme that uses colors across from each other on the color wheel. In this box, you will paint your drawing using a complementary color scheme. You can mix the two complements together to get a wide range of colors. Also experiment using the tints and shades of the complements you chose. |
Monochromatic Color Scheme:
A color scheme that uses one color plus its tints, shades, and tones. In this box, you will paint your drawing using a monochromatic color scheme. To create a tint, adding more water to a color is like adding white paint. The more water in the color, the more of the white of the paper shows through. To create a shade, simply add black. |
|
Warm Color Scheme:
A color scheme that uses warm colors, red, yellow, and orange. In this box, you will paint your drawing using a warm color scheme. Experiment using the tints and shades of the warm colors. You also must include one to three areas of one cool color as an accent. |
Cool Color Scheme:
A color scheme that uses cool colors, green, blue, and violet. In this box, you will paint your drawing using a cool color scheme. Experiment using the tints and shades of the cool colors. You also must include one to three areas of one warm color as an accent. |
Arbitrary Color Scheme:
A color scheme chosen by the artist to express a feeling or mood. In this box, you will choose any three colors you wish. Experiment using the tints and shades of the colors you choose. You may use up to ONE additional color in one to three areas of this box as an accent color. |
Tips for Using Watercolors:
|
Clean Up Procedures:
If you are painting, you may clean up at 8:30
|
Final Project - 10pts
|
The final project is an "Artist's Choice" project. The topic and medium(material) is up to you, but it must be school appropriate, and meet the following criteria:
|
